Create a Group
Step 1: In the Main Navigation Bar, click on ‘Admin’ and click on Group Management.
Step 2: The user working with different organizations that may have subsidiaries/ divisions can create multiple groups/ sub-groups.
Step 3: Click on the add icon, located on the bottom right of the screen to Create a group. (Refer to the image below).
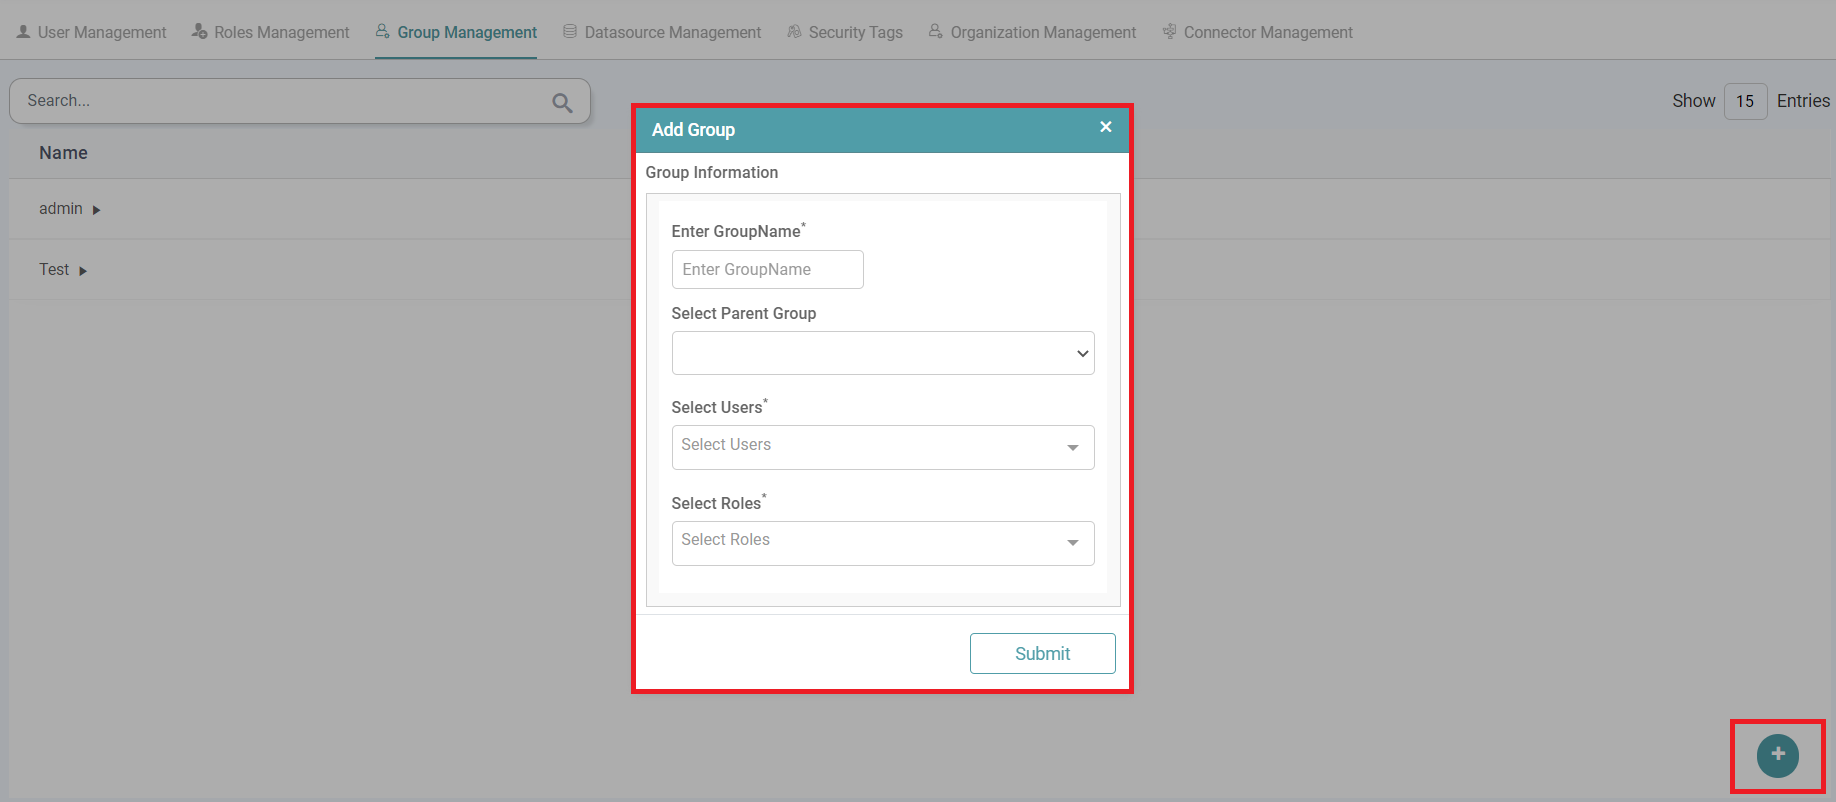


Step 4: You can add a group by entering the group information like the group name, parent group, select users and select roles. Click on the submit button.
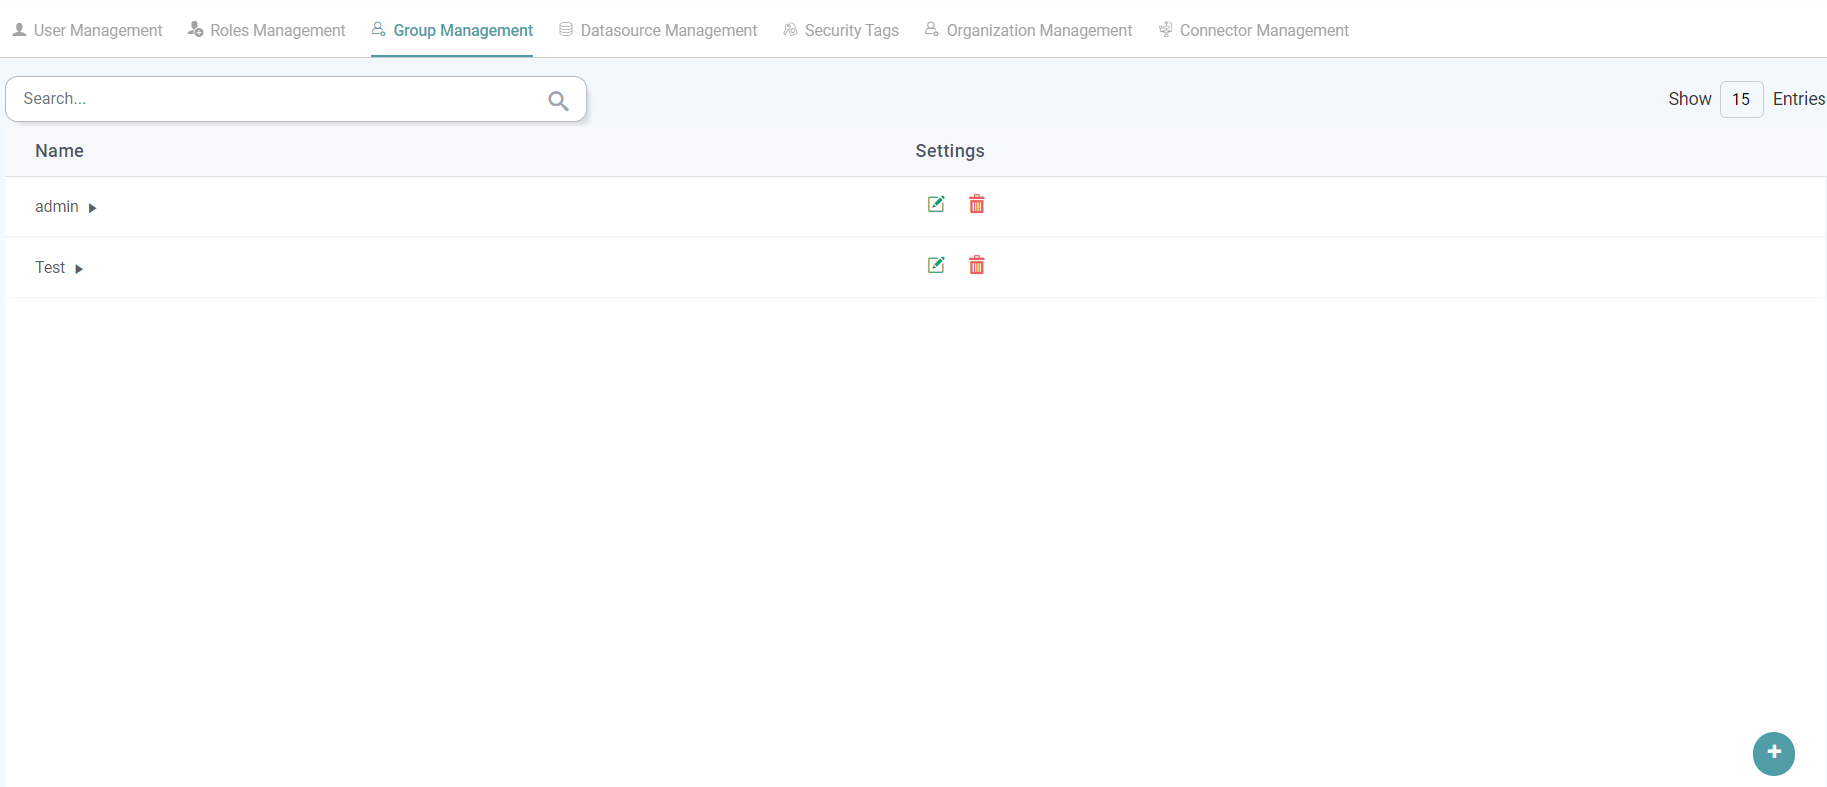
Step 5: The group is created successfully. You can also add sub-groups to that group. You can choose the users and their roles each time. (Refer to the image below).
Settings
Edit
Step 1: In the Main Navigation Bar, click on ‘Admin’ and click on Group Management. Create a group.
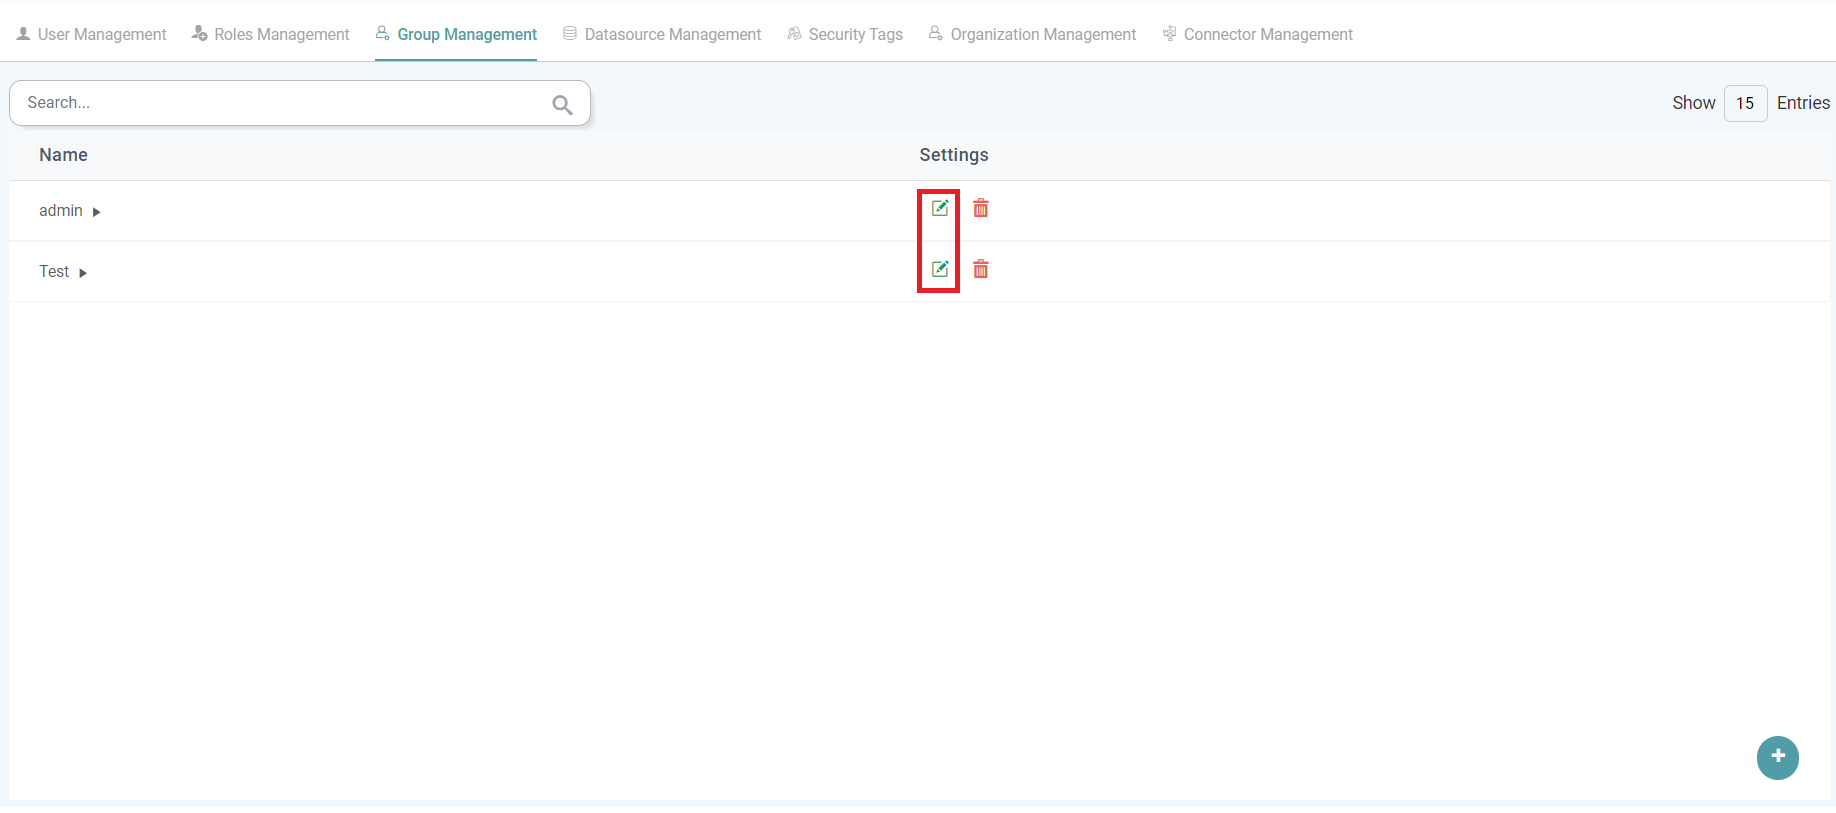
Step 2: You can individually edit the group/ sub-groups that have been created.
Step 3: Click on the edit icon to edit the group/ sub-groups. (Refer to the image below).
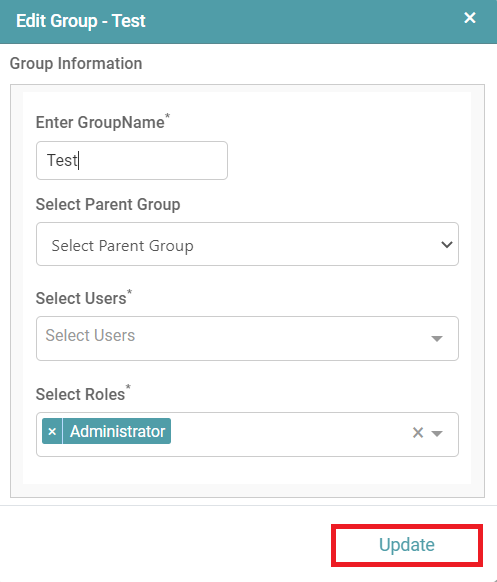
Step 4: A “Edit group” pop-up appears. You can now make the required changes. Click on the update button to save those changes. (Refer to the image below).
Delete
Step 1: In the Main Navigation Bar, click on ‘Admin’ and click on Group Management to Create a group.
Step 2: You can individually delete the group/ sub-groups that have been created.
Step 3: Click on the delete icon to delete the group/ sub-groups. (Refer to the image below).

Step 4: A warning pop-up appears. Click on ok to delete the group/ sub-group. (Refer to the image below).
Step 5: You will get a message that indicates that the group has been successfully deleted. (Refer to the image below).

Search
Step 1: In the Main Navigation Bar, click on ‘Admin’. Click on Group Management to add/see the list of groups/ sub-groups created.
Step 2: In the search tab, enter the group name. The group with the text entered will be shown in the list. (Refer to the image below).
