Overview
Connector Management allows users to create and maintain connections to external data sources within Datanyx. Connectors serve as reusable configurations that enable data ingestion from cloud storage, databases, and third-party applications.
Use Connector Management to:
- Establish connections to supported external systems
- Centralize and standardize data source configurations
- Enable data pipelines and reports to access external data
Supported Connection Types
Datanyx supports the following connection types:
- FTP
- Amazon S3
- Azure Blob Storage
- File Location (local file path)
- Databricks
- Smartsheet
- Jira
- Salesforce
- Amazon Redshift
- AWS
Create a Connector
Step 1: In the Main Navigation Bar, click on ‘Data Source’ and click on the connector management tab. (Refer to the images below).


Step 2: Click on the add icon, located in the bottom right of the screen to Create a connector. (Refer to the image below).
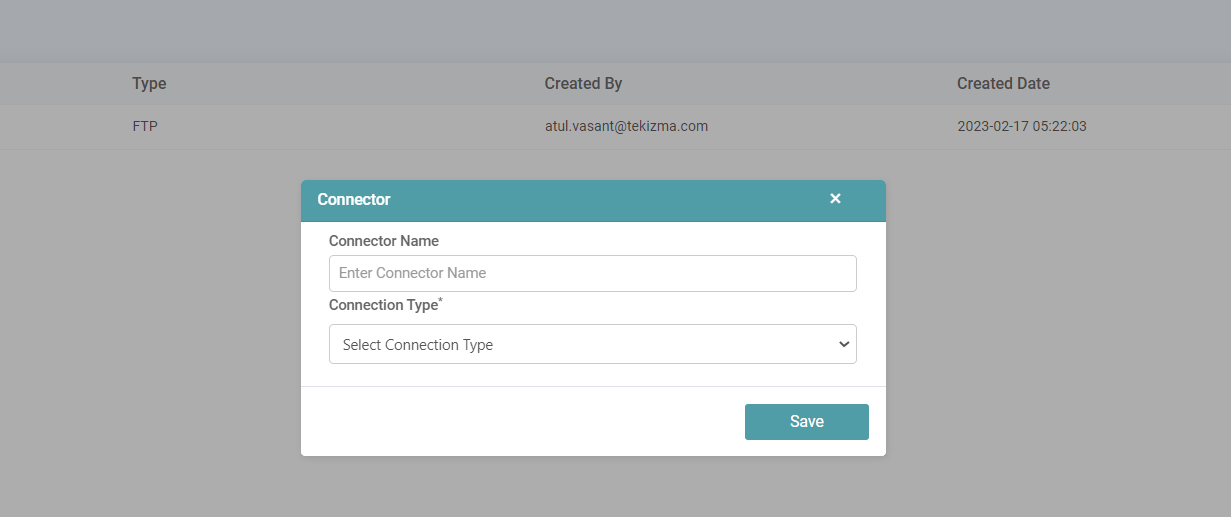
Step 3: Enter the connector name and choose the connection type. You can choose between FTP, S3, Azure Blob, File location (local file location), Databricks, Smart Sheet, Jira, Salesforce, Redshift and AWS with respect to the connection type.
Configuration Requirements by Connection Type
| Connection Type | Required Fields |
|---|---|
| FTP | Host name, Port, Username, Password, File path |
| Amazon S3 | Secret key, Access key, Region, Bucket name |
| Azure Blob | SAS URL, Base URL, Container name |
| File Location | Local file path |
| Databricks | Host name, Access token |
| Smartsheet | Access token |
| Jira | Domain URL, Username, API access token |
| Salesforce | Username, Password, Security token or Consumer key |
| Amazon Redshift | Port, Database name, Schema name, Username, Password |
| AWS | Secret key, Access key, Region |
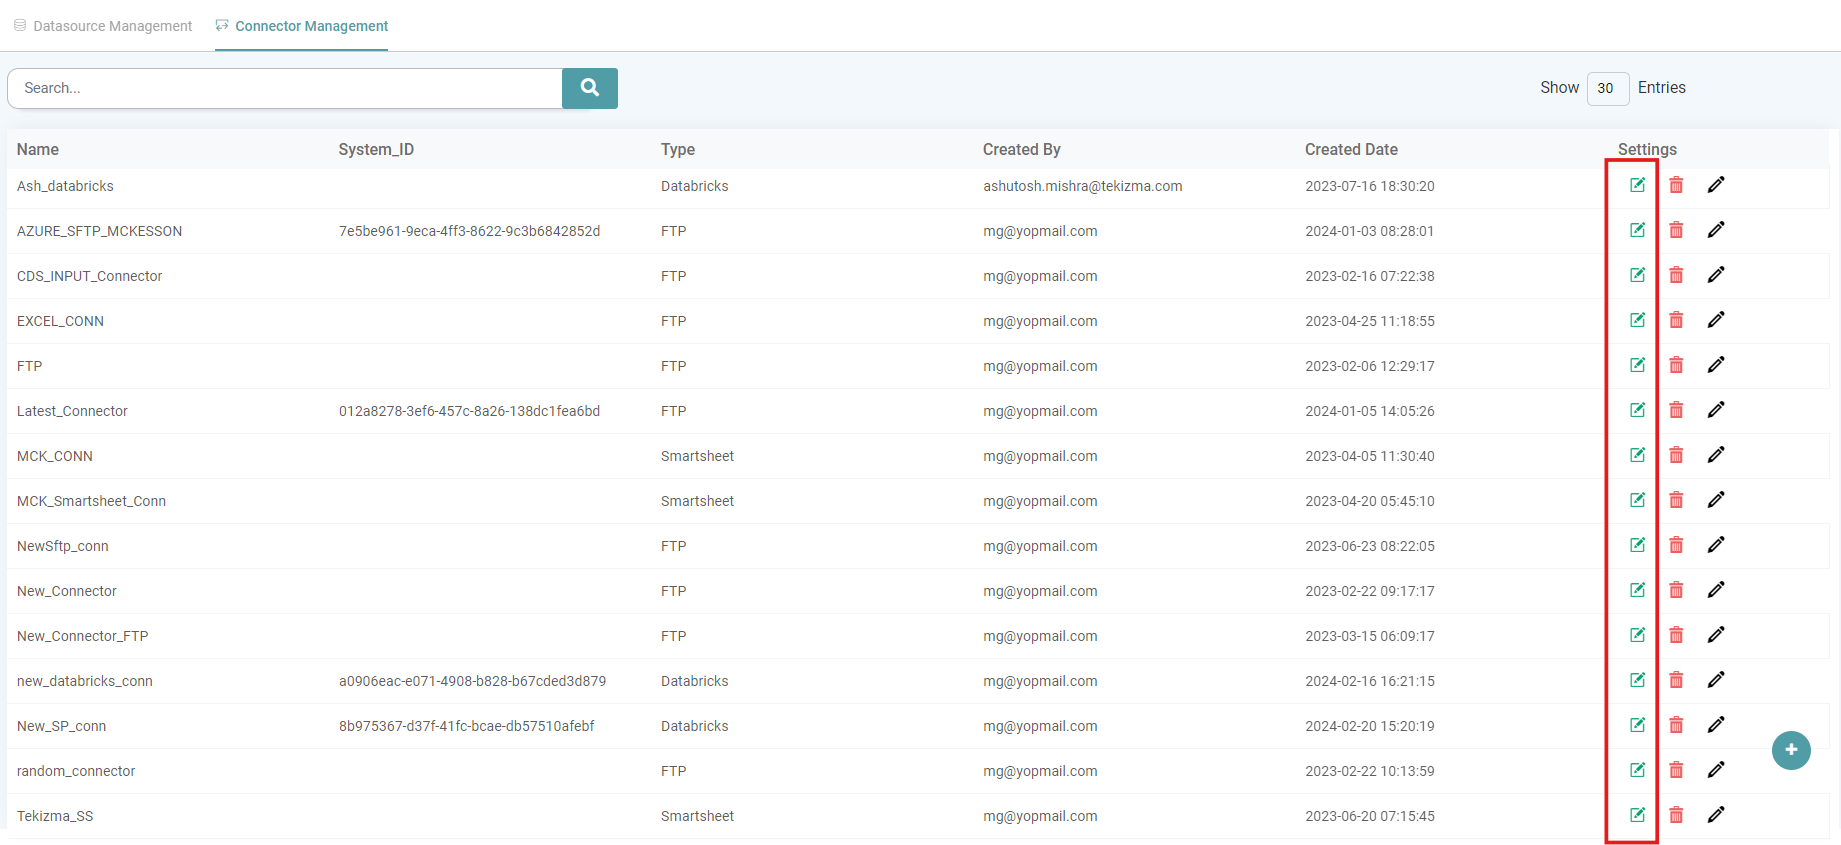
Step 4: You can see the connector that has been created in the list. The name, type, created by and created date, settings of the connector is visible on the list.
Settings
Edit
Step 1: Under settings, you can edit and/ or delete the connectors.
Step 2: If you want to edit the connectors, you can do so by clicking on the edit icon. (Refer to the image below).
Delete
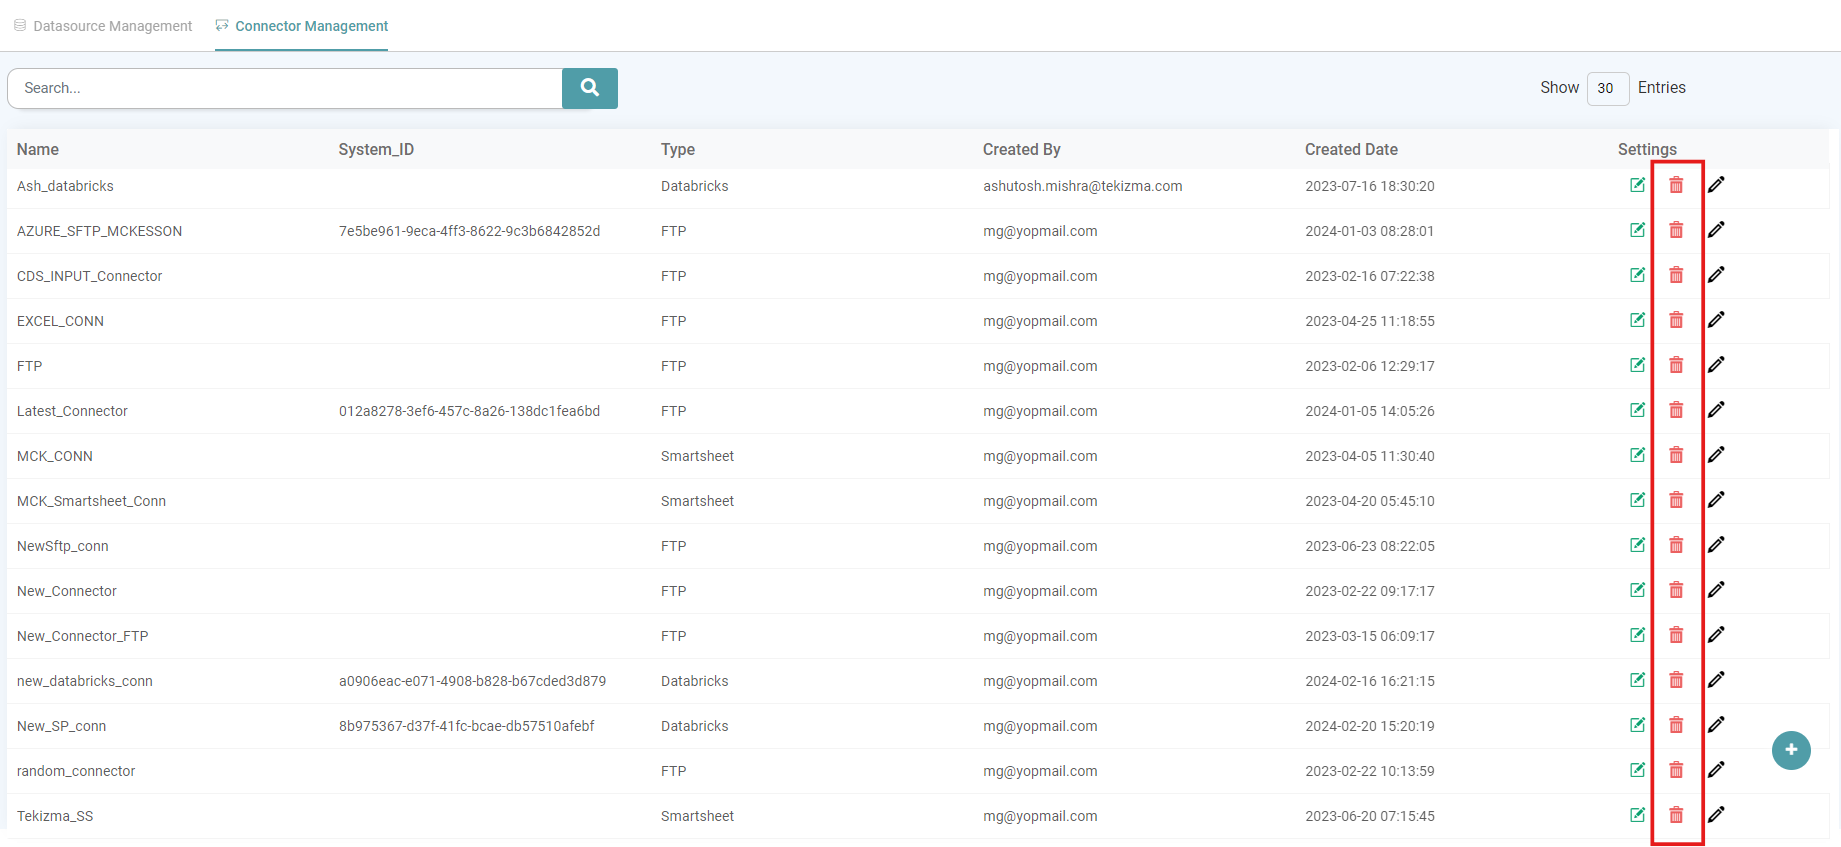
Step 1: Under settings, you can edit and/ or delete the connectors.
Step 2: If you intend to delete the connector that has been created, then you can do so by clicking on the delete icon. (Refer to the image below).
Search
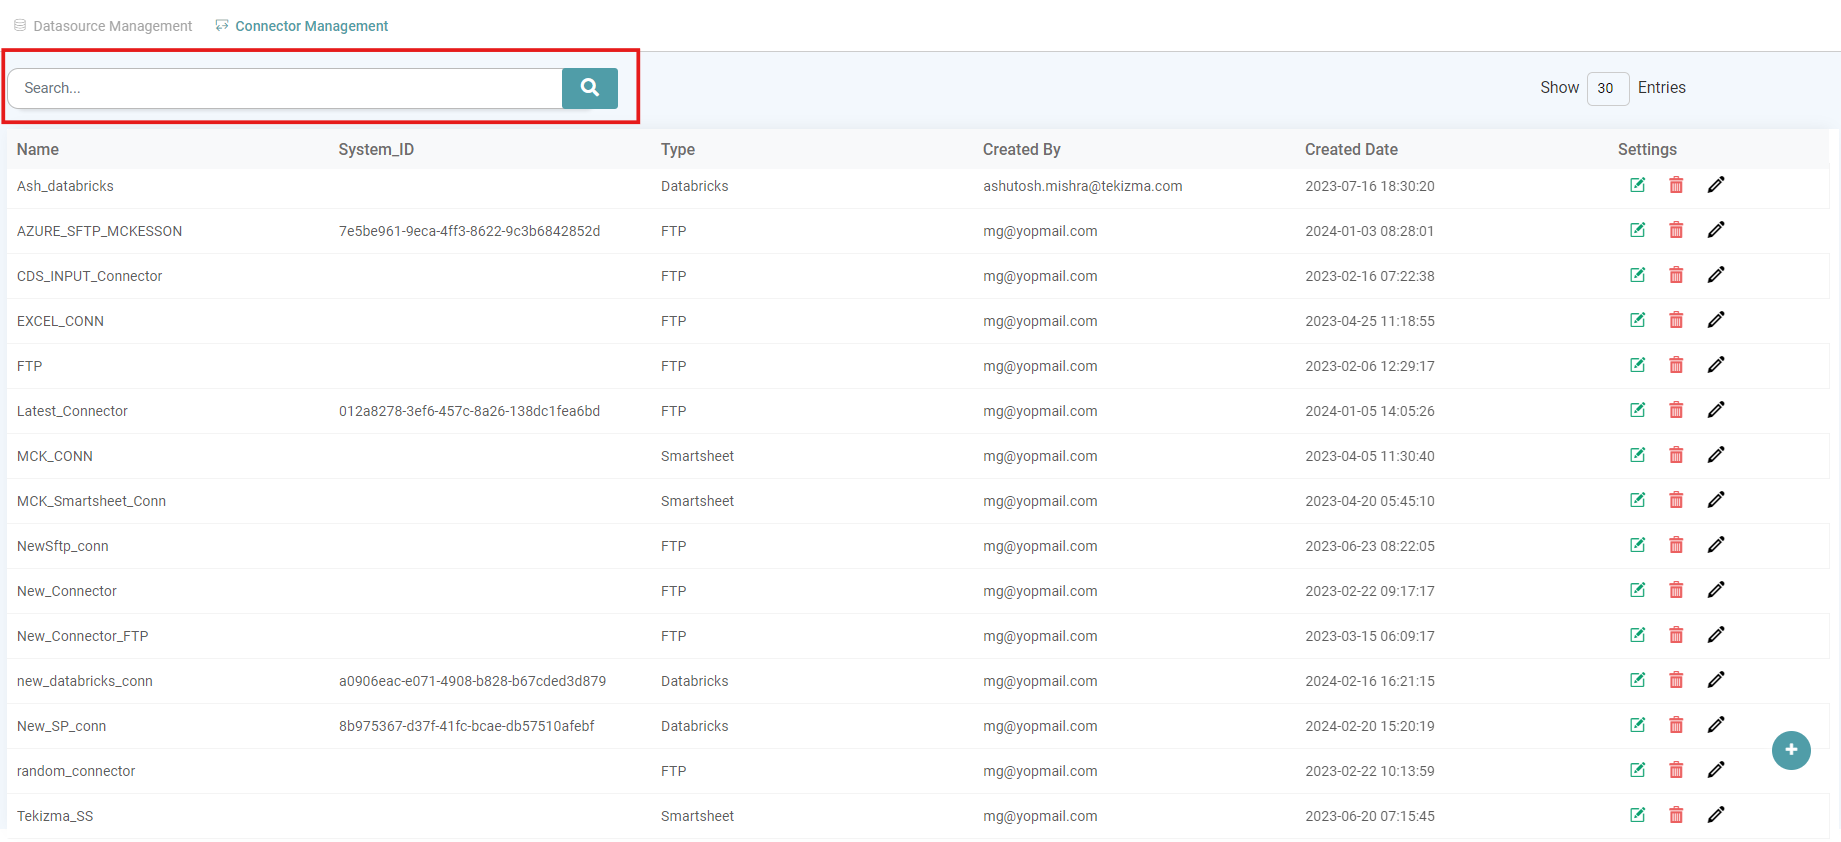
Step 1: In the Main Navigation Bar Click on ‘Data Source’. Click on Connectors tab to add/ see the list of Connectors.
Step 2: To search the connectors we have created, use the search bar enter the name of the connector and hit the search button. (Refer to the image below).
Viewing Connectors
After creation, connectors are displayed in a list showing:
- Connector name
- Connection type
- Created by
- Creation date
- Settings options