Overview
A Data Model defines the relationships between multiple tables within a datasource. It enables users to connect datasets together, allowing columns from each connected table to be used for creating charts, reports, and applying filters.
By linking related datasets, users can build comprehensive visualizations that draw from multiple tables without requiring manual data consolidation.
Creating a Data Model
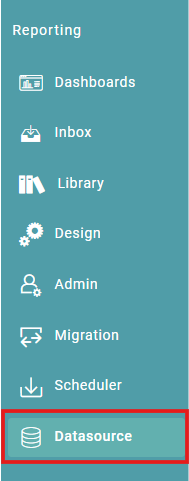
Step 1: Click on the ‘Datasource Tab’ on the ‘Main Navigation bar’. (Refer to the image below).


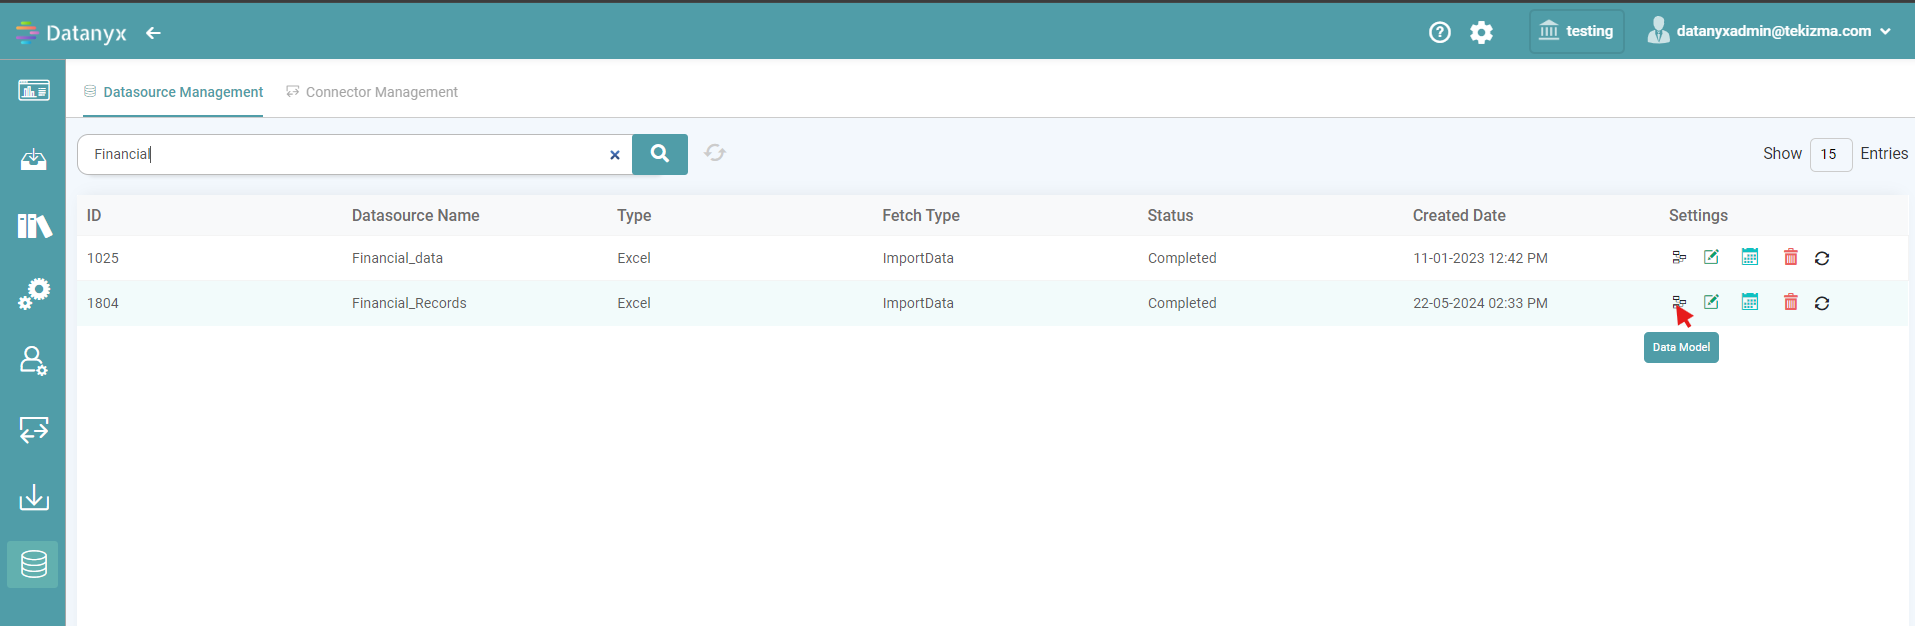
Step 2: Select the Data Source Management tab and click/ search the specific Data Source. Click on the Data Model icon. (Refer to the image below).
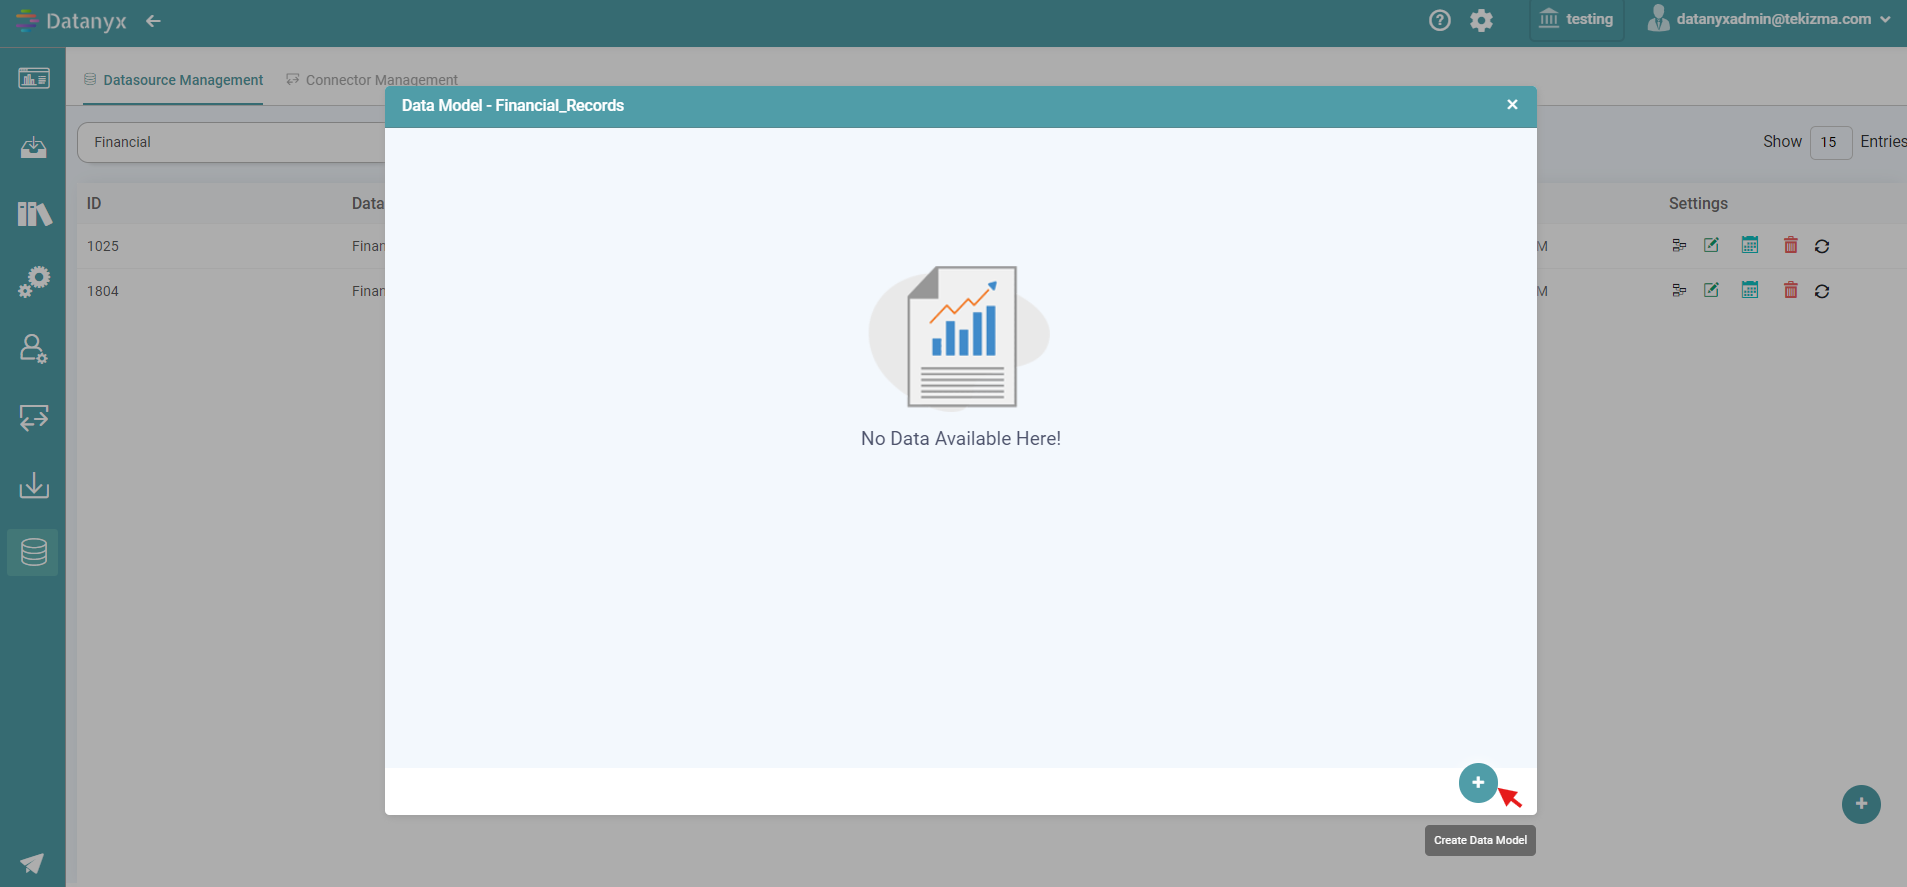
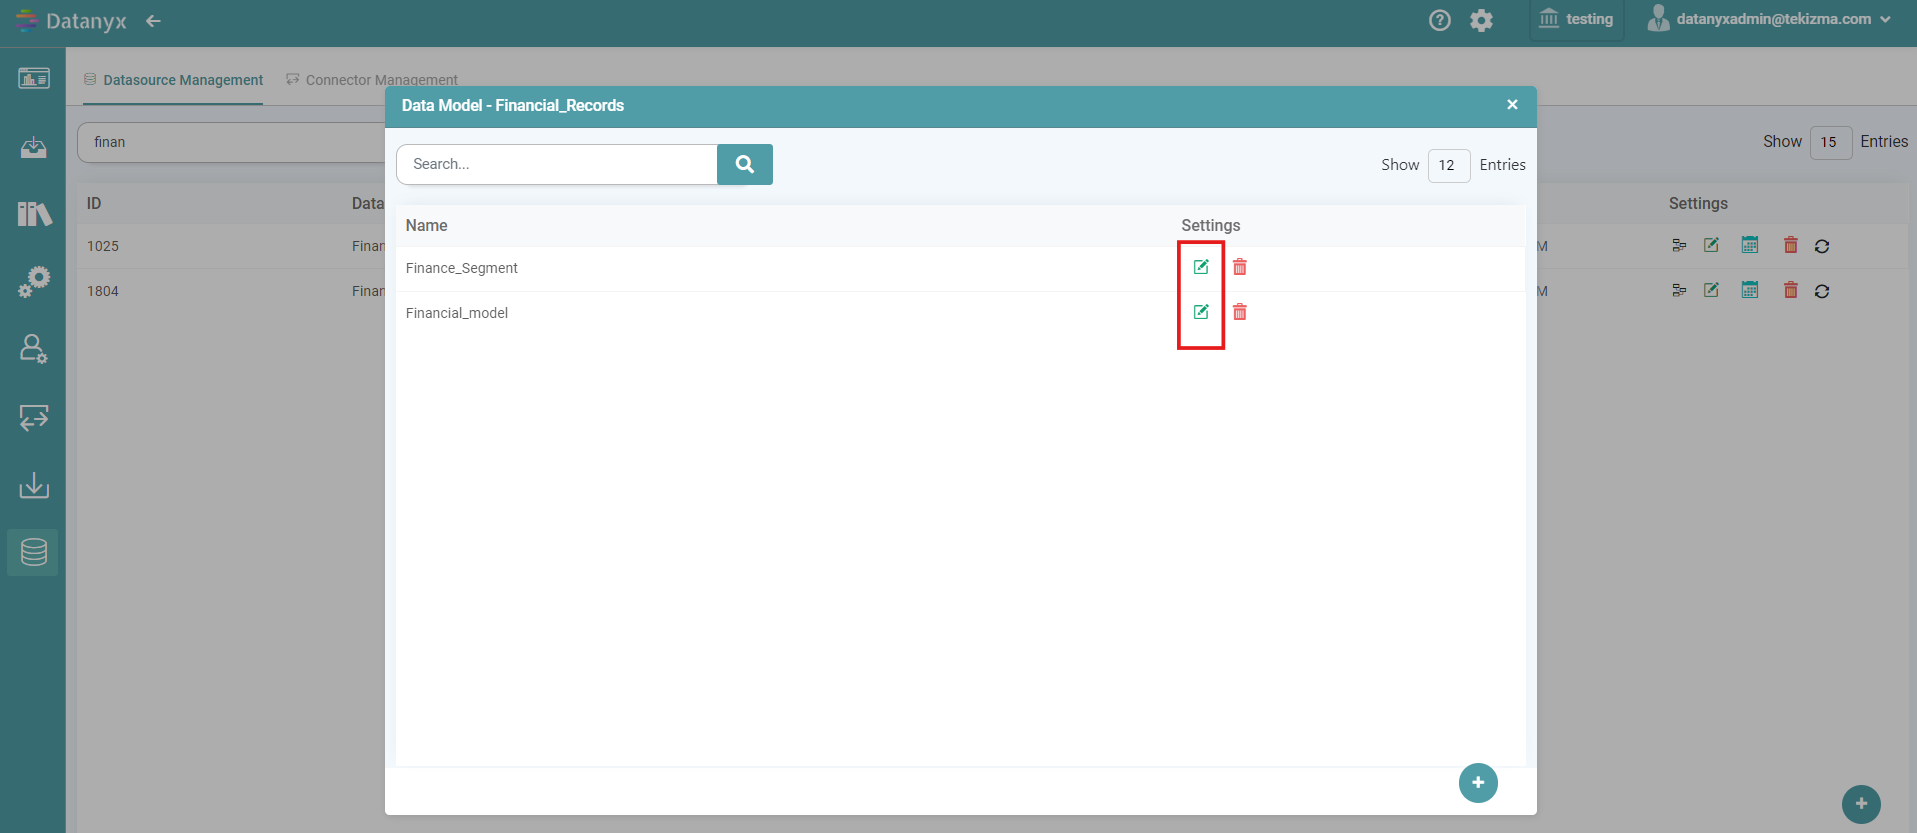
Step 3: Then, click on the create new Data Model icon located in the bottom right corner of the Data Model pop-up. (Refer to the image below).
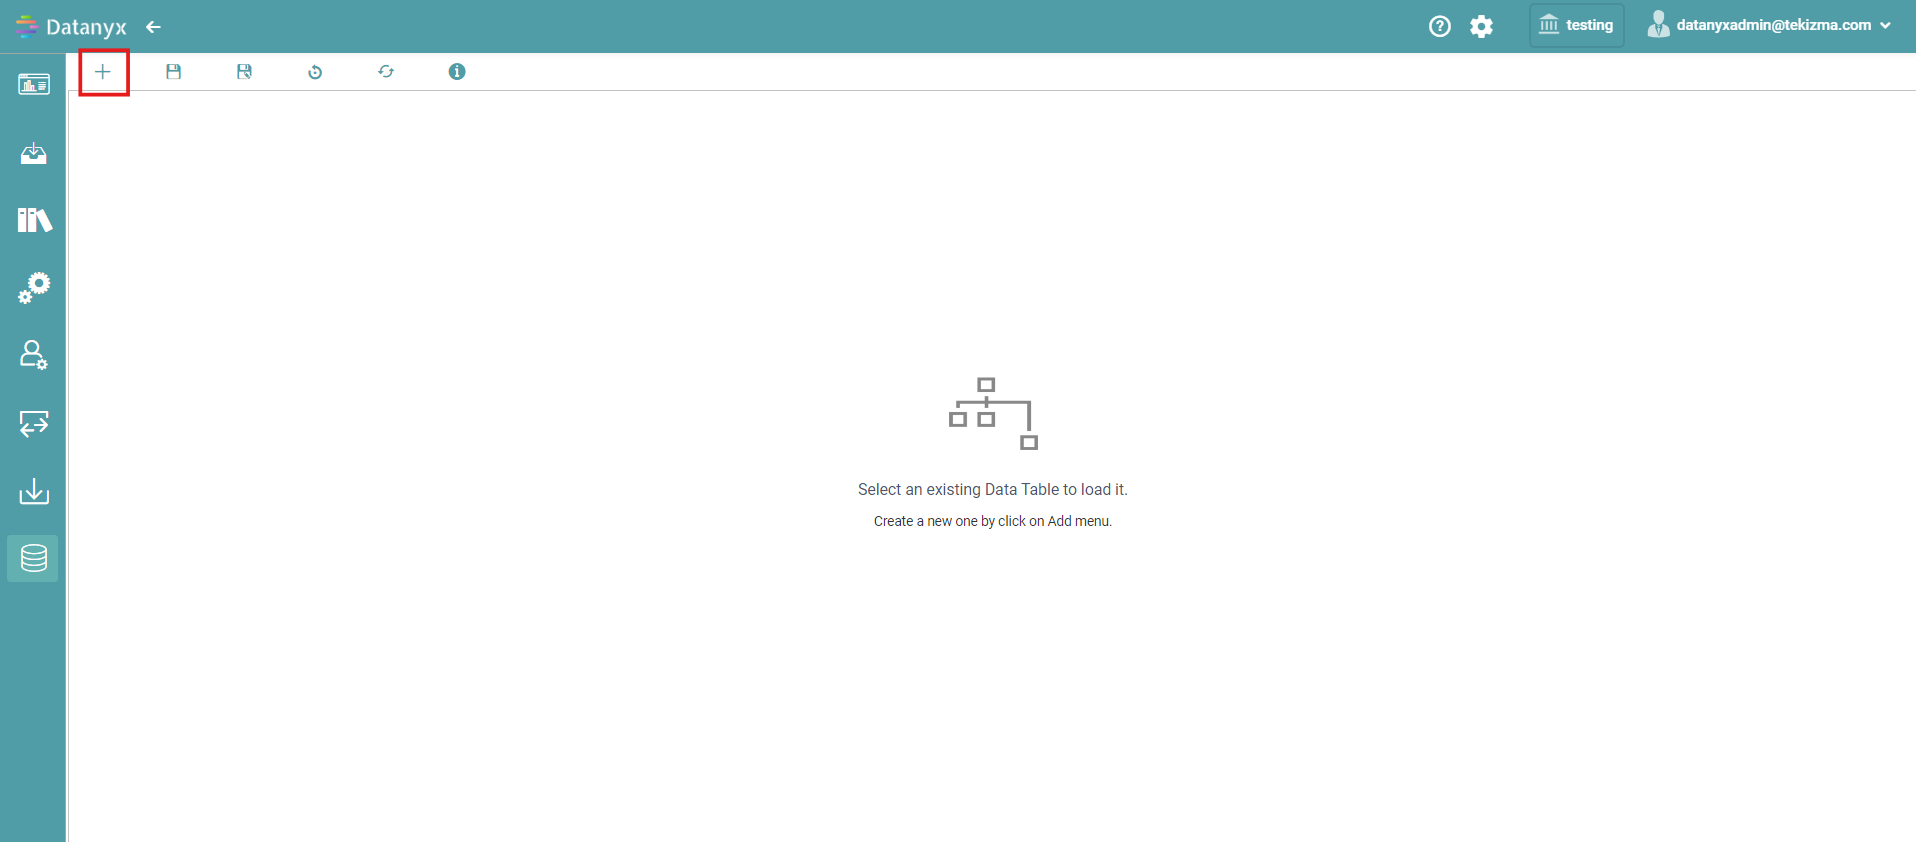
Step 4: Now, click the add icon located in the top left corner of the newly opened screen. (Refer to the image below).

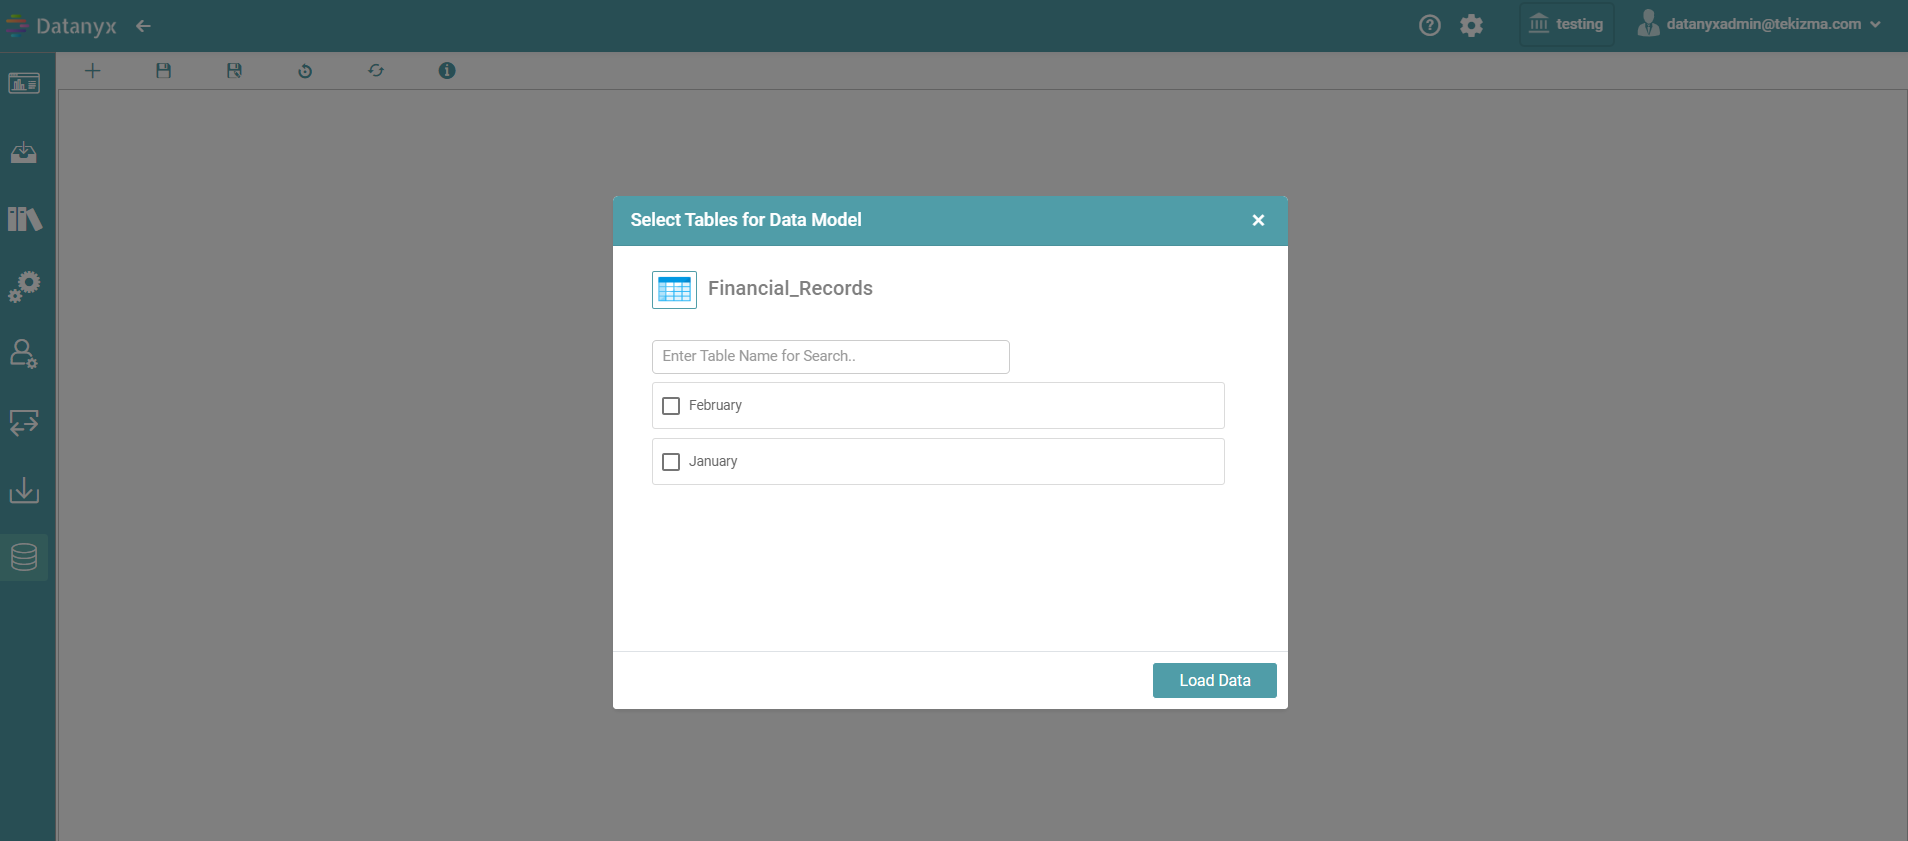
Step 5: Select table pop-up appears. Select the tables needed for the data model and click on load data. (Refer to the image below).
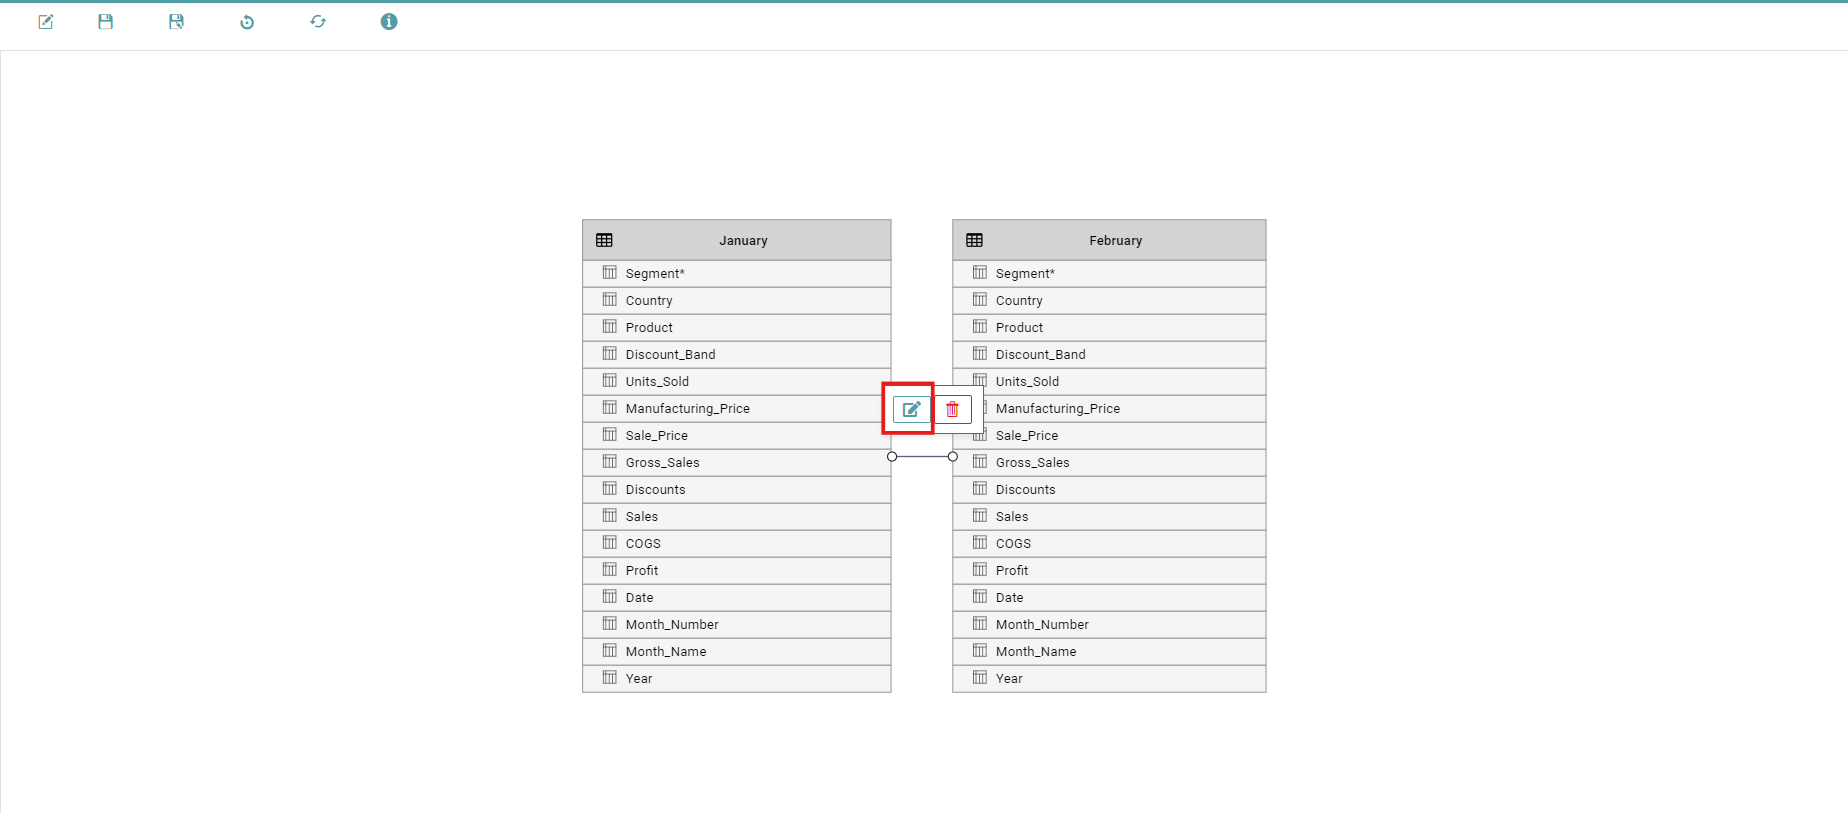
Step 6: Now, you can create a Data Model by establishing a relationship between the tables selected.
Edit
New Data Model
Step 1: Click on the ‘Datasource Tab’ on the ‘Main Navigation bar’.
Step 2: Select the Data Source Management tab and click/ search the specific Data Source. Click on the Data Model Icon.
Step 3: Click “Edit” to add tables needed for the Data Model. (Refer to the images below).

Step 4: Connect the dots in the sheets according to the user requirement. Configure the Relationship of sheet by connecting the dots.
Step 5: Click on the save icon.
Existing Data Model
Step 1: Click on the ‘Datasource Tab’ on the ‘Main Navigation bar’.
Step 2: Select the Data Source Management tab and click/ search the specific Data Source. Click on the Data Model Icon.
Step 3: Click the “Edit” option to open the required Data Model. (Refer to the image below).
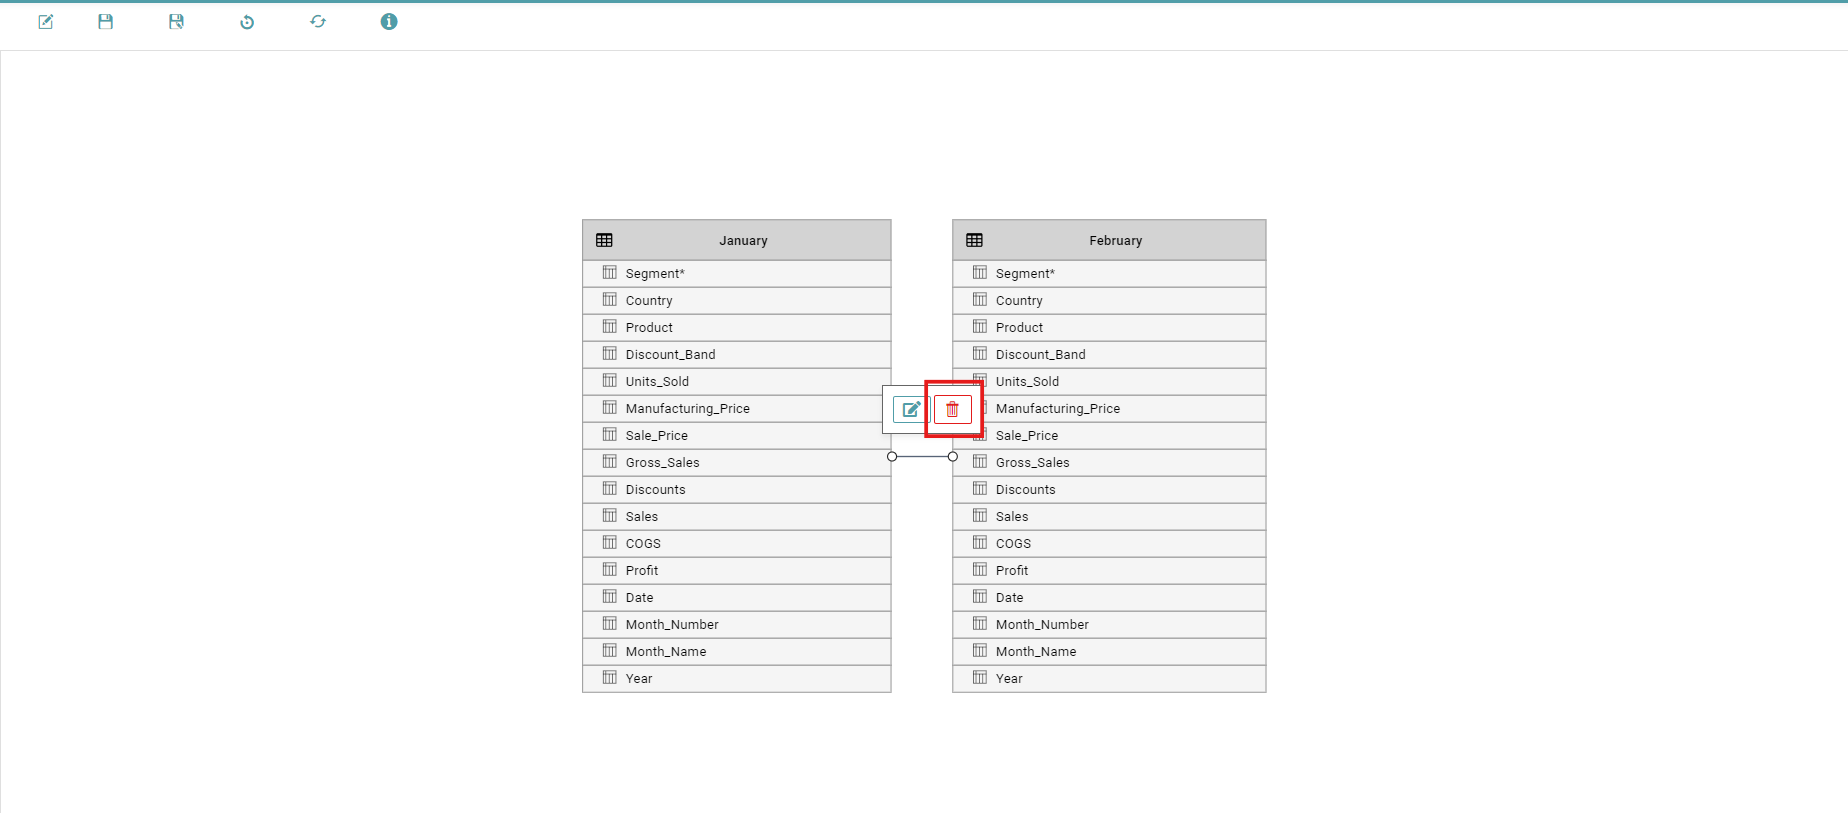
Step 4: To re-configure the connection, click on the line and click on the Edit icon. (Refer to the image below).
Save
Step 1: Configure the Relationship of sheet by connecting the dots and click save.
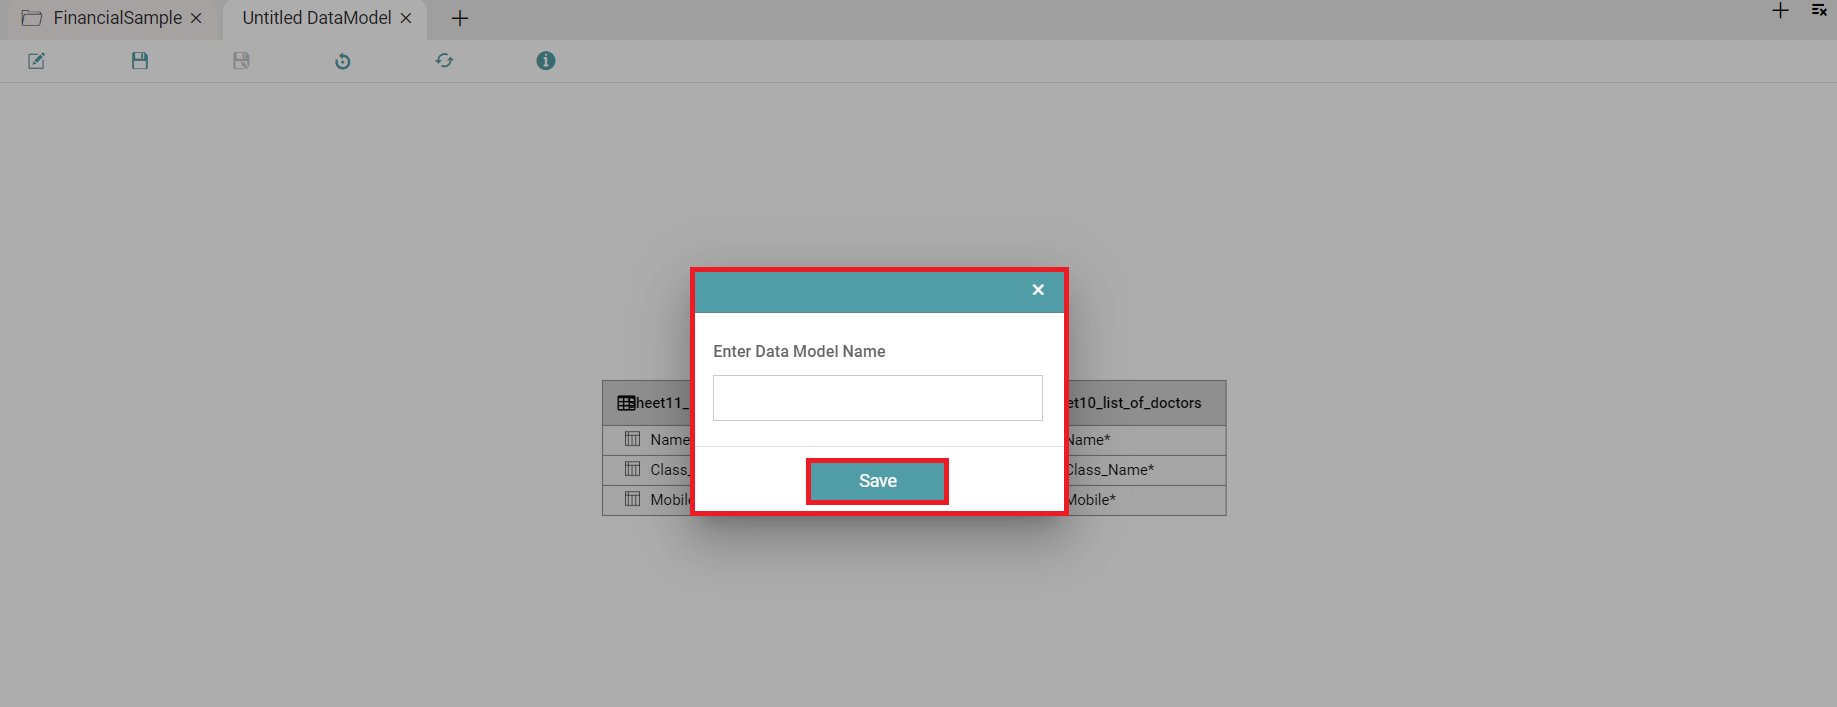
Step 2: After the configuration has been saved, click on the save icon and enter a data model name to save the Data Model. (Refer to the image below).
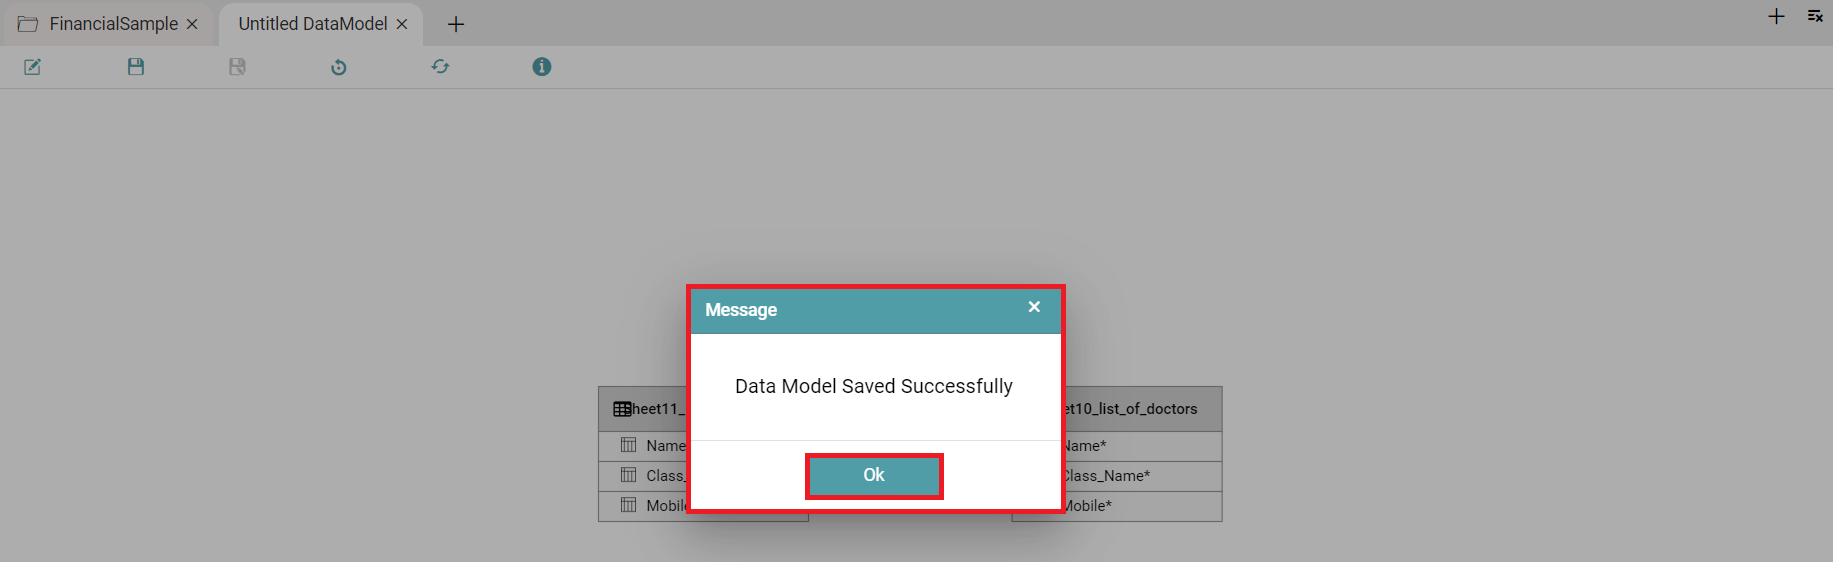
Step 3: A pop-up appears, and the Data Model has been saved successfully. Click on the ok button. (Refer to the image below).
Save As
Step 1: Click on the ‘Datasource Tab’ on the ‘Main Navigation bar’.
Step 2: Select the Data Source Management tab and click/ search the specific Data Source.
Step 3: Click the “Edit” option to open an existing Data Model.
Step 4: Click on the Save As button and enter the new Data Model name in the Data Table pop-up. (Refer to the image below).

Note: You can create a copy of an existing Data Model with a different name using this option.
Reset
The Reset Icon is used to reset the whole Data Model. (Refer to the image below).

Refresh
The Refresh Icon is used to refresh the workspace. (Refer to the image below).

Help
The user can click on the help icon for further assistance. (Refer to the image below).

Delete
Step 1: Click on the ‘Datasource Tab’ on the ‘Main Navigation bar’.
Step 2: Select the Data Source Management tab and click/ search the specific Data Source.
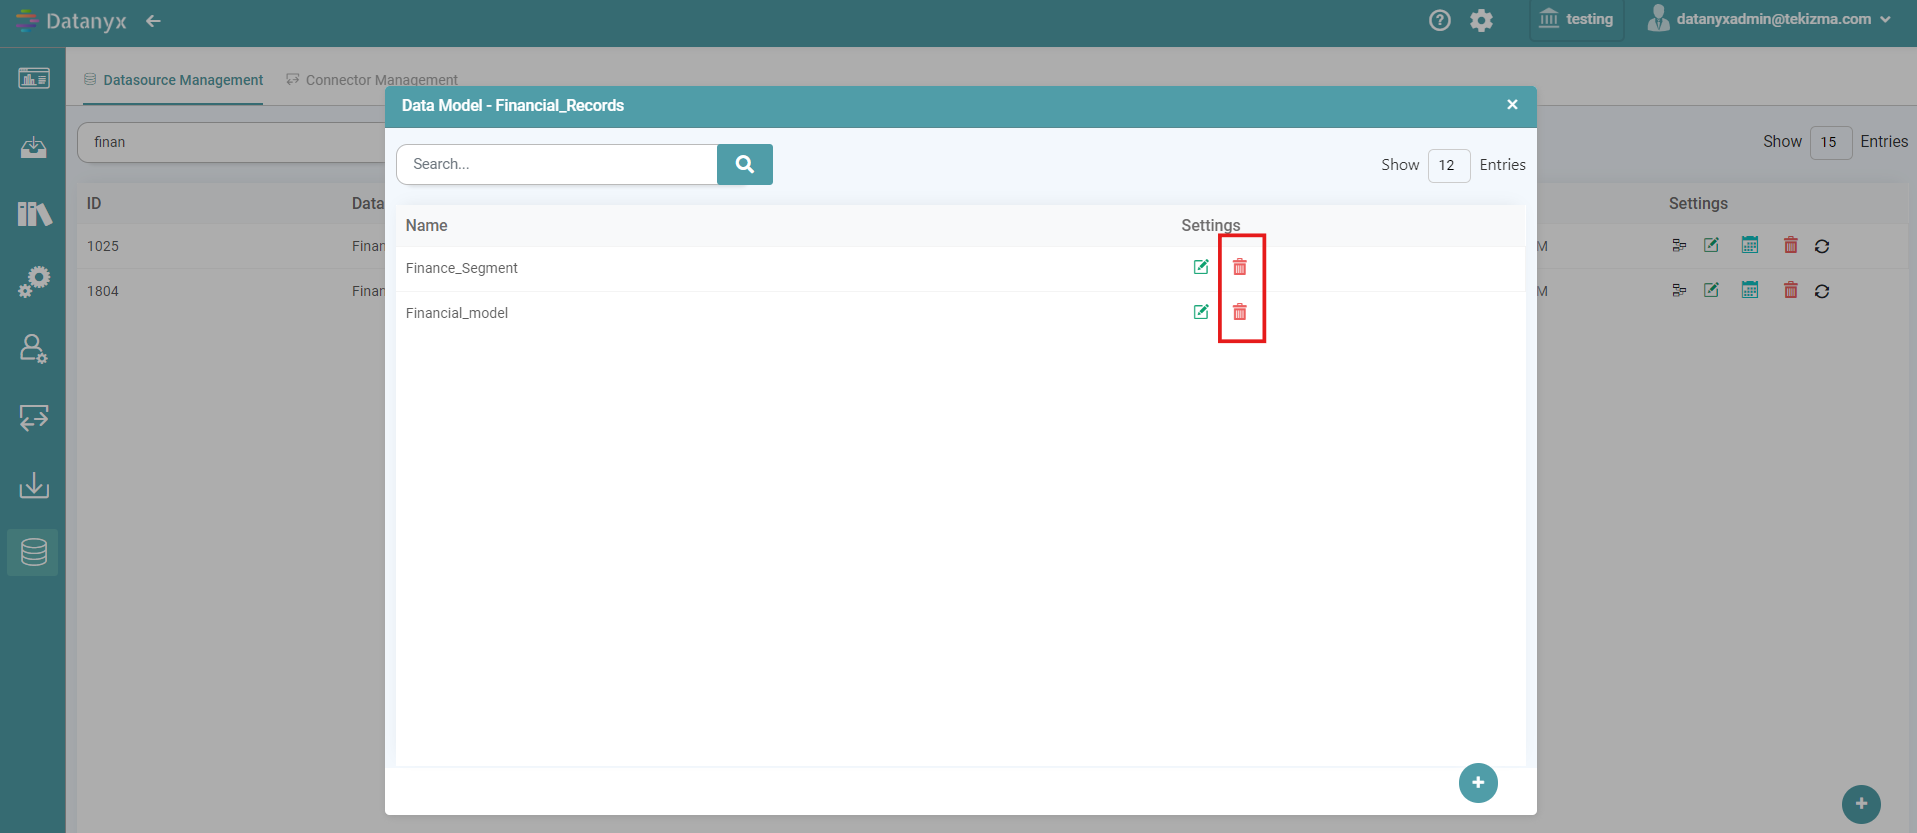
Step 3: Click on the Data Model icon to open the Data Model pop-up. The existing Data Model for the Data Source that you have chosen will be displayed.
Step 4: Click on the Delete Icon. (Refer to the image below).
Note: If you click on a Data Source which does not have existing Data Model’s, you will be taken to the Data Model Creation Page.
Delete – Existing Configuration
Step 1: Click on the ‘Datasource Tab’ on the ‘Main Navigation bar’.
Step 2: Select the Data Source Management tab and click/ search the specific Data Source.
Step 3: Click on the Data Model icon to open the Data Model pop-up. The existing Data Model for the Data Source that you have chosen will be displayed.
Step 4: Click on the Edit icon to open it.
Step 5: Click on the line connecting the two tables and click on the Delete icon to delete the existing connection. (Refer to the image below).