Create Dimension
Step 1: Click on the Design Tab on the Main Navigation tool bar.
Step 2: Click on Add New. Now click on Folder to create a new project folder.
Step 3: Click the dimension icon to create a new dimension.
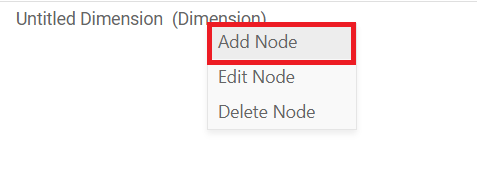
Step 4: Click on the plus icon. Untitled dimension will appear. Now, right click on it and select Add node. (Refer to the image below).
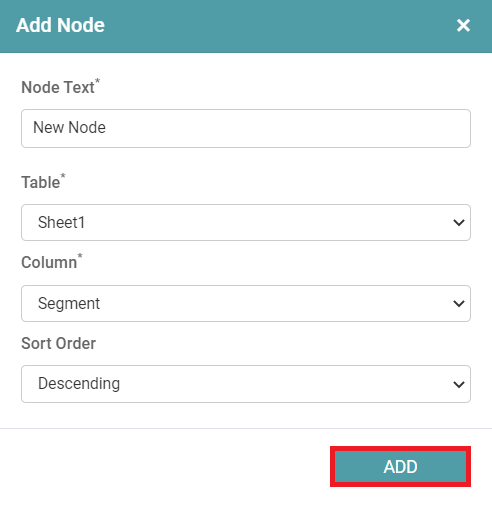
Step 5: Add node popup will appear. Enter the name of the Dimension under Node text and select all the required fields. Click on the ADD button. (Refer to the image below).
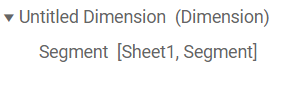
Step 6: The created Node will be added to dimension. (Refer to the image below).
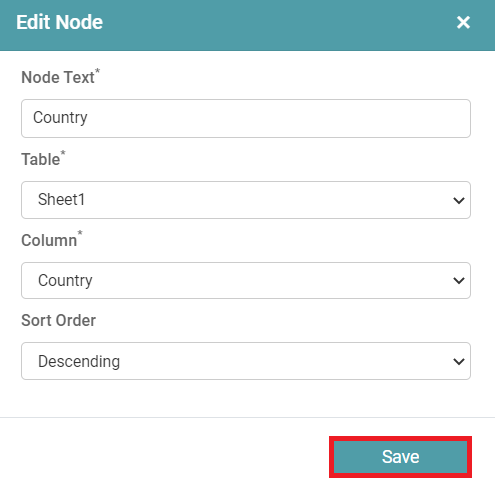
Step 7: Right click on the dimension. Click on edit node. (Refer to the image below).

Step 8: The edit node popup appears. Now, change the name under the node text and click on save. (Refer to the image below).
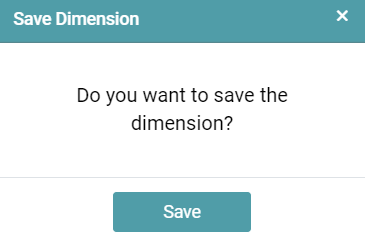
Step 9: The Save dimension popup appears. Click save. (Refer to the image below).
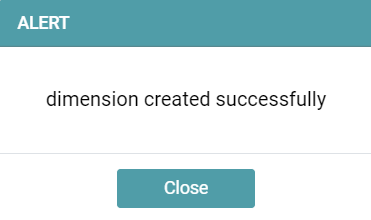
Step 10: The user can now see an alert popup that says that the dimension has been created successfully. Click the close button. (Refer to the image below).

Delete Node
Step 1: Create a dimension and add nodes for the dimension.
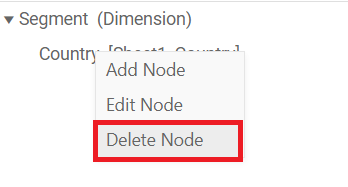
Step 2: Right click on any node and click on the delete node option. (Refer to the image below).
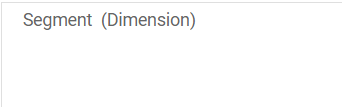
Step 3: That node is deleted from dimension. (Refer to the image below).
Save
Step 1: Create a dimension.
Step 2: Click on the save icon. The save dimension popup appears. Click on Save. (Refer to the image below).

Step 3: A alert popup which indicates that the dimension is created successfully appears. Click on the close button. (Refer to the image below).
Save As
Step 1: Create a dimension or select an existing dimension.
Step 2: Click on the save as icon. The save dimension popup appears.
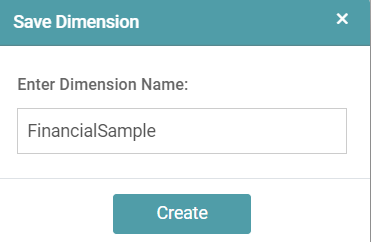
Step 3: Enter the name for the dimension and click on the create button. (Refer to the image below).
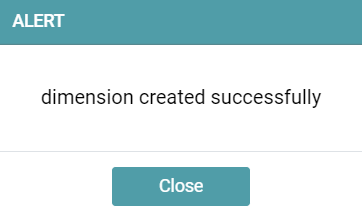
Step 4: A alert popup which indicates that the dimension is created successfully appears. Click on the close button. (Refer to the image below).
Step 5: The Dimension name is updated and saved.

Reset
Step 1: Create a dimension or select an existing dimension.
Step 2: Click on the reset icon.
Step 3: All the changes that have been made will be lost.
Refresh
Step 1: Create a dimension or select an existing dimension.
Step 2: Click on the refresh icon.
Step 3: Changes made in dimension are updated or screen will be refreshed.
Edit
Step 1: Click on the Design Tab on the Main Navigation tool bar.
Step 2: Click on the add icon on the bottom right of the screen.
Step 3: Reports/charts/dimension list will appear.
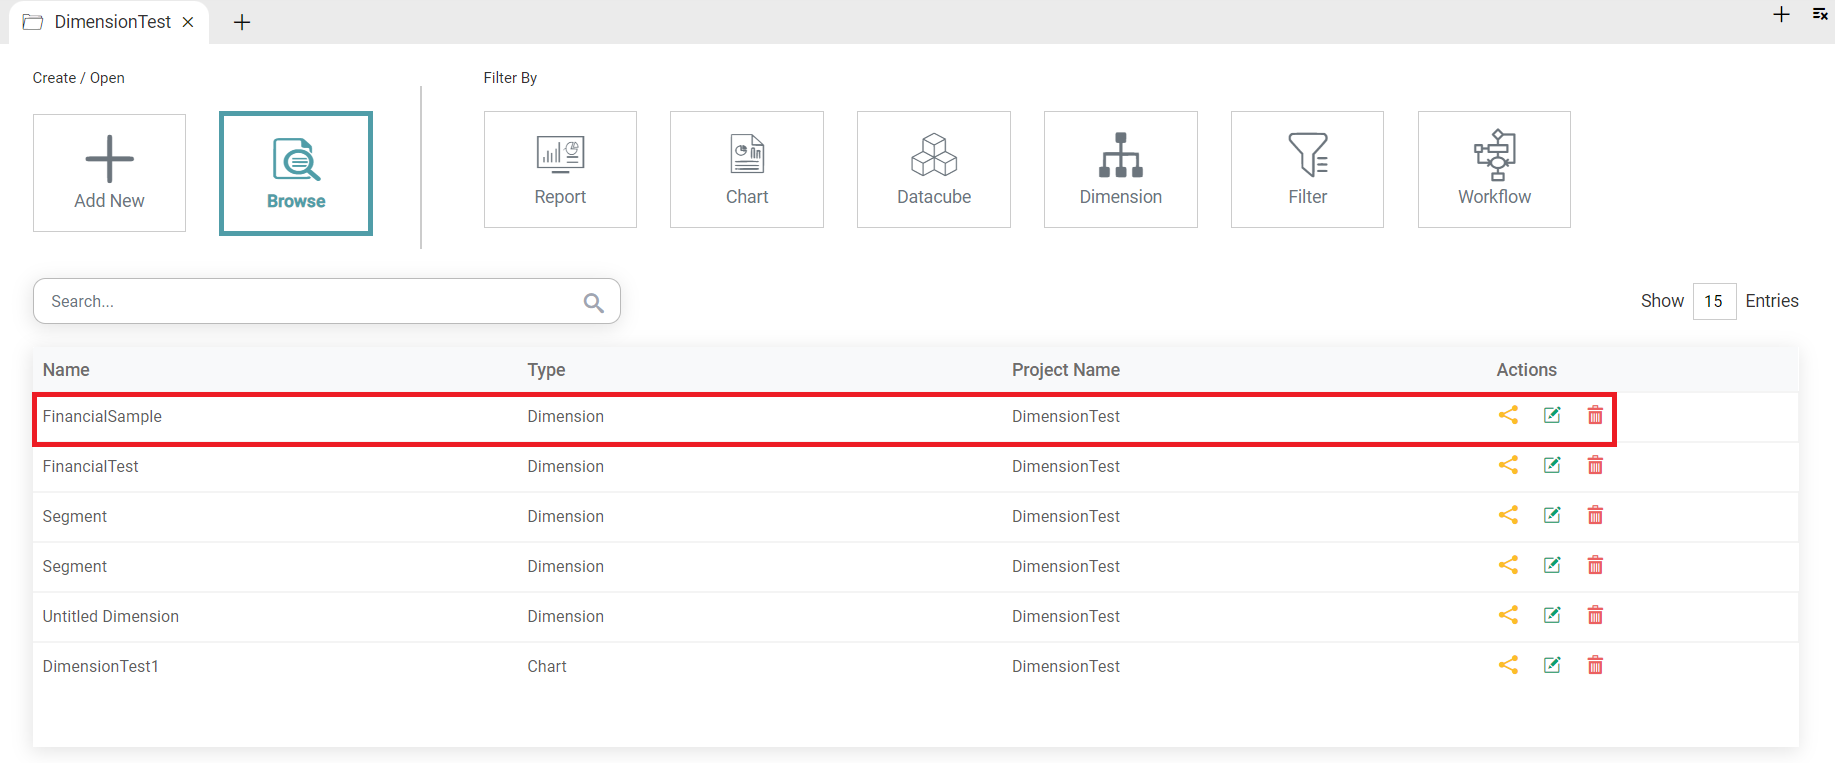
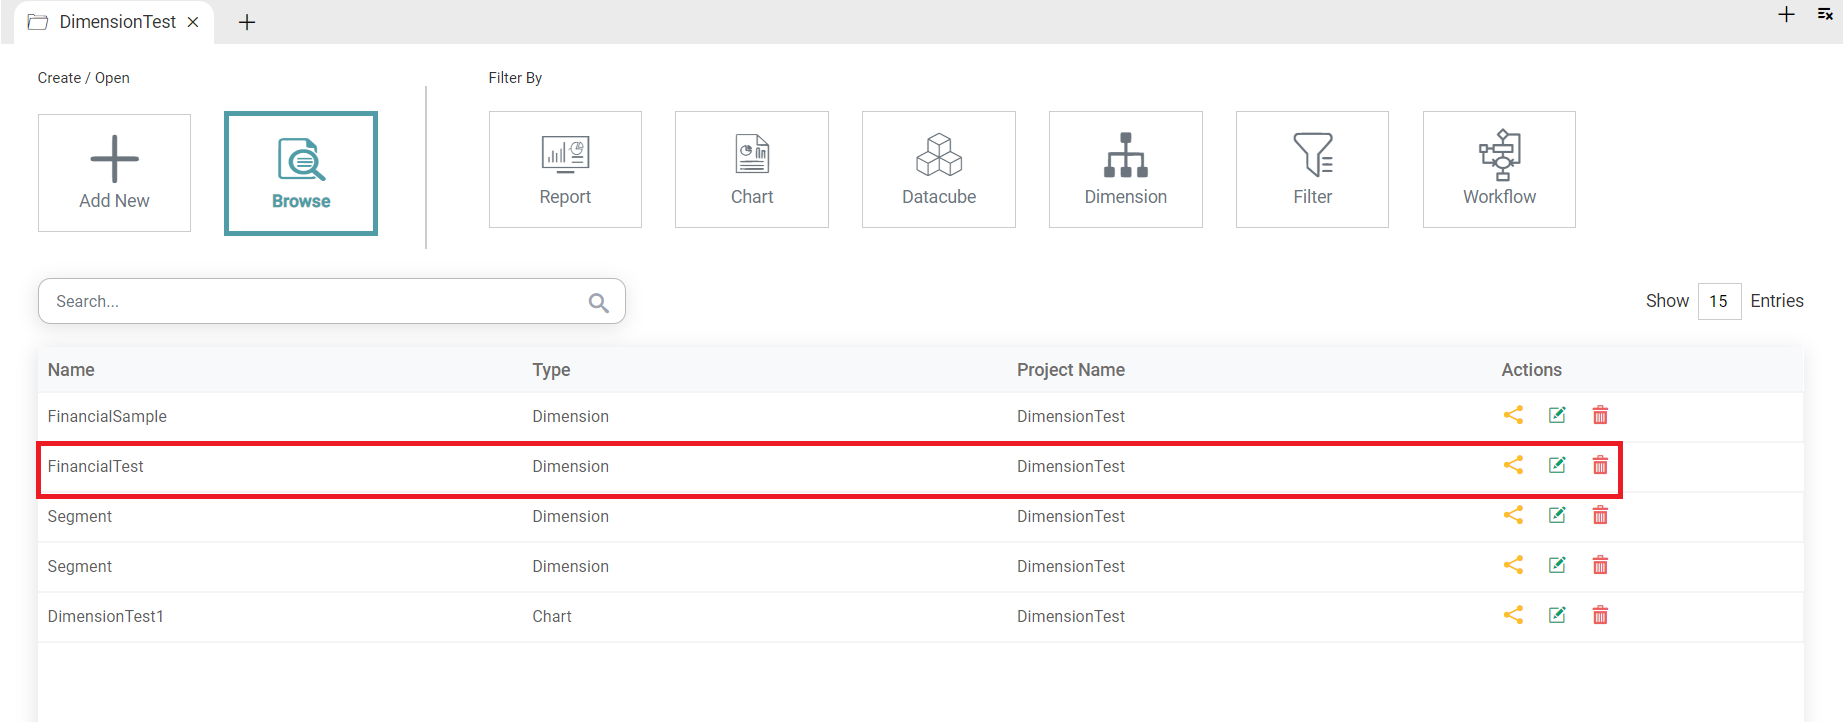
Step 4: Click on the edit icon for dimension. (Refer to the image below).


Step 5: You will be directed to that dimension. Now, you can make the necessary changes. (Refer to the image below).

Delete
Step 1: Click on the Design Tab on the Main Navigation tool bar.
Step 2: Click on the add icon on the bottom right of the screen.
Step 3: Reports/charts/dimension list will appear.
Step 4: Click on the delete icon. (Refer to the image below).
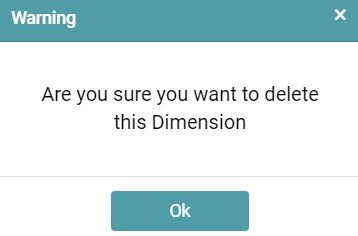
Step 5: A warning message popup appears. Click the OK button. (Refer to the image below).
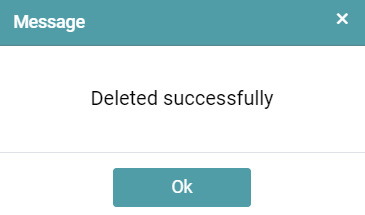
Step 6: A popup message appears. Click on the OK button. (Refer to the image below).
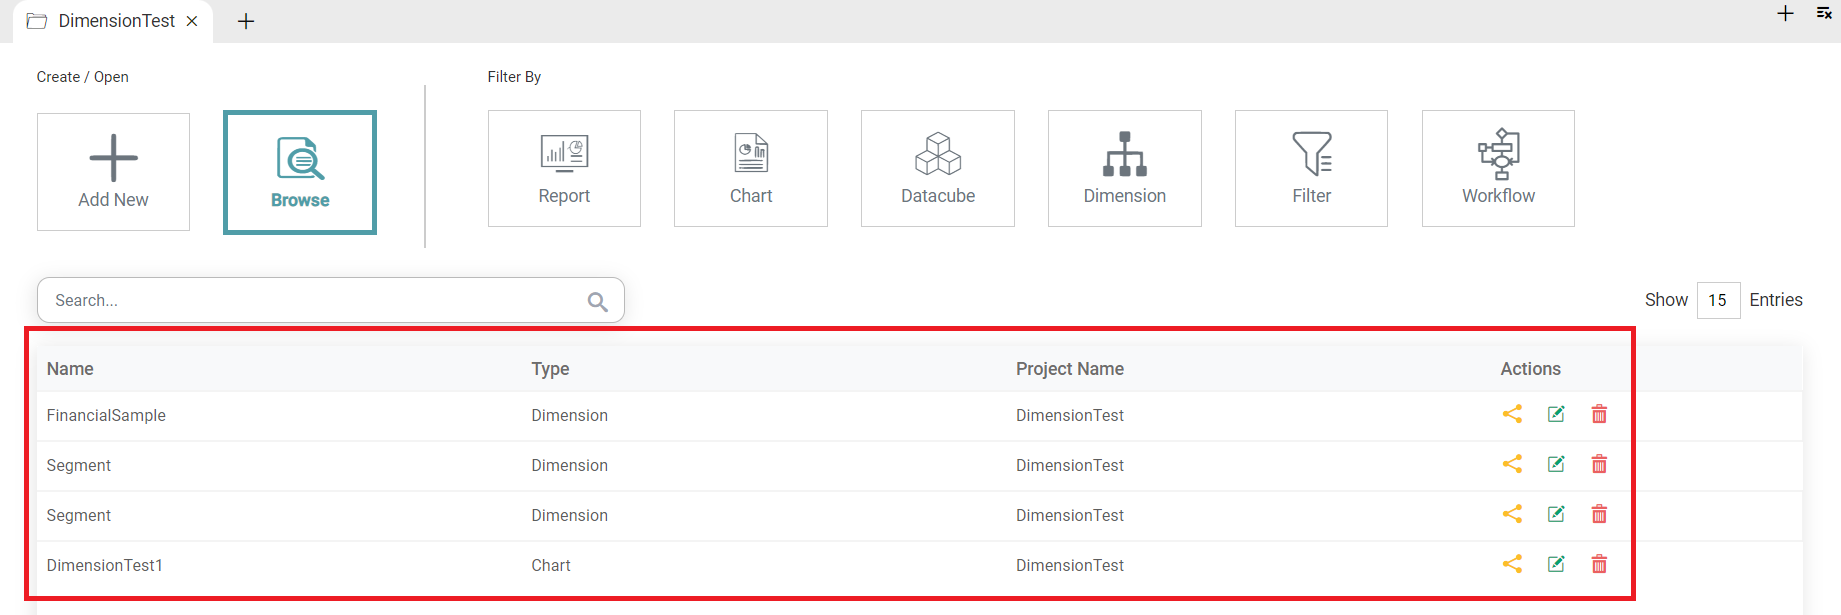
Step 7: The dimension is deleted from the list. (Refer to the image below).
Share
Step 1: Click on the Design Tab on the Main Navigation tool bar.
Step 2: Click on the add icon on the bottom right of the screen.
Step 3: Reports/charts/dimension list will appear.
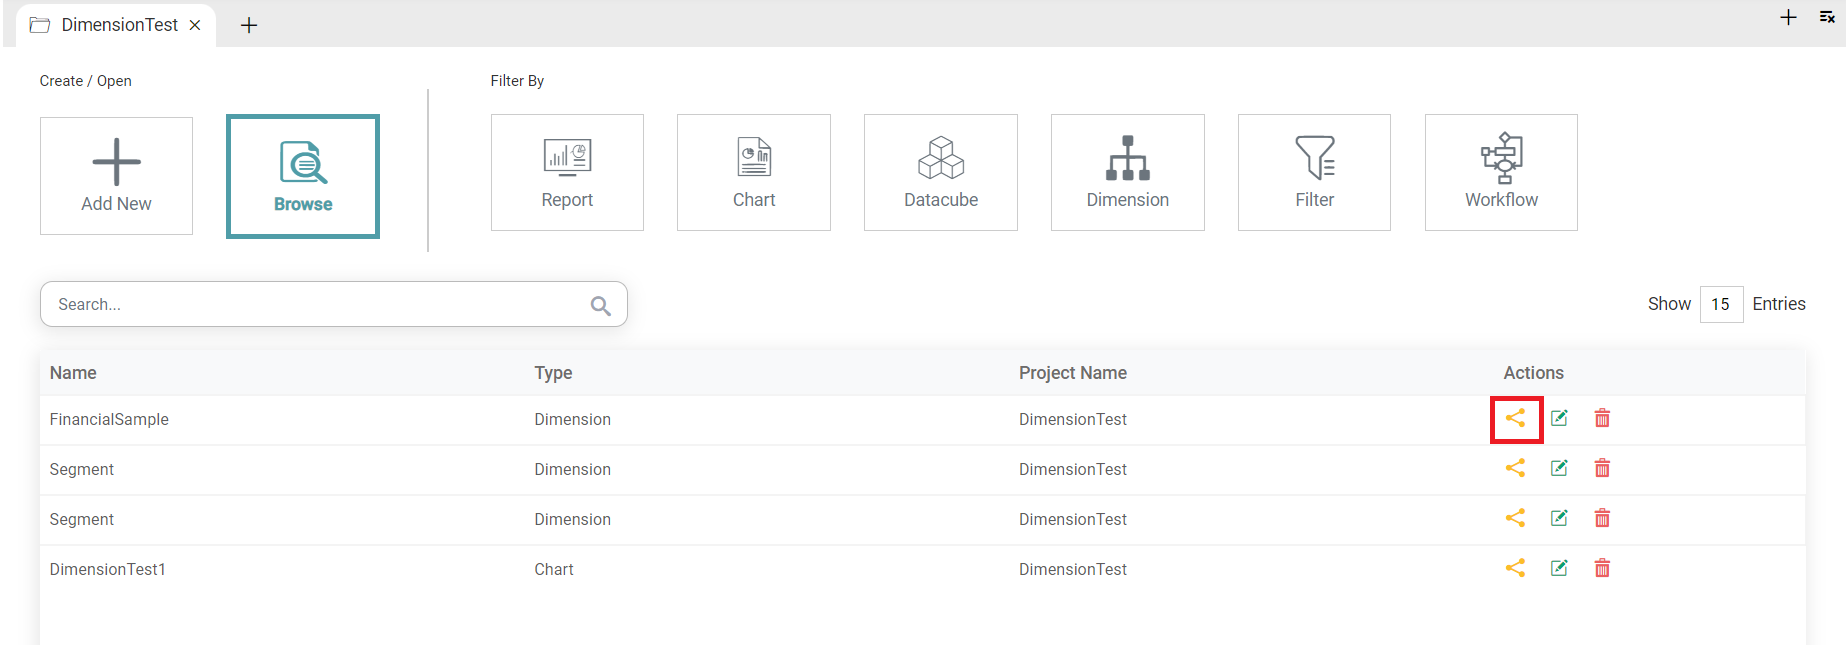
Step 4: Click on the share icon. (Refer to the image below).
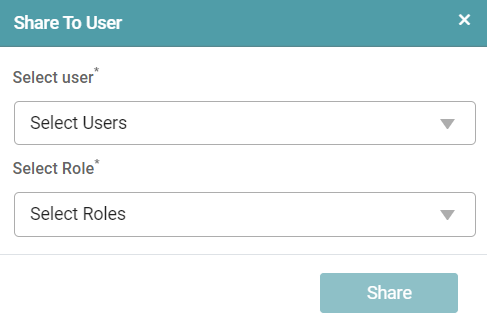
Step 5: A share to user popup appears. Now, select the user and the user role. Click on the share button. (Refer to the image below).
Step 6: The dimension is successfully shared.