Validation Node – Introduction
The validation node is meant for validating a certain criterion.
Step 1: Once data has been imported, click on the data preparation tab.
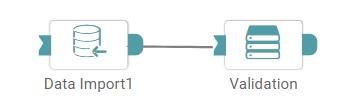
Step 2: Drag and drop the validation node onto the main screen and connect the two nodes. (Refer to the image below).


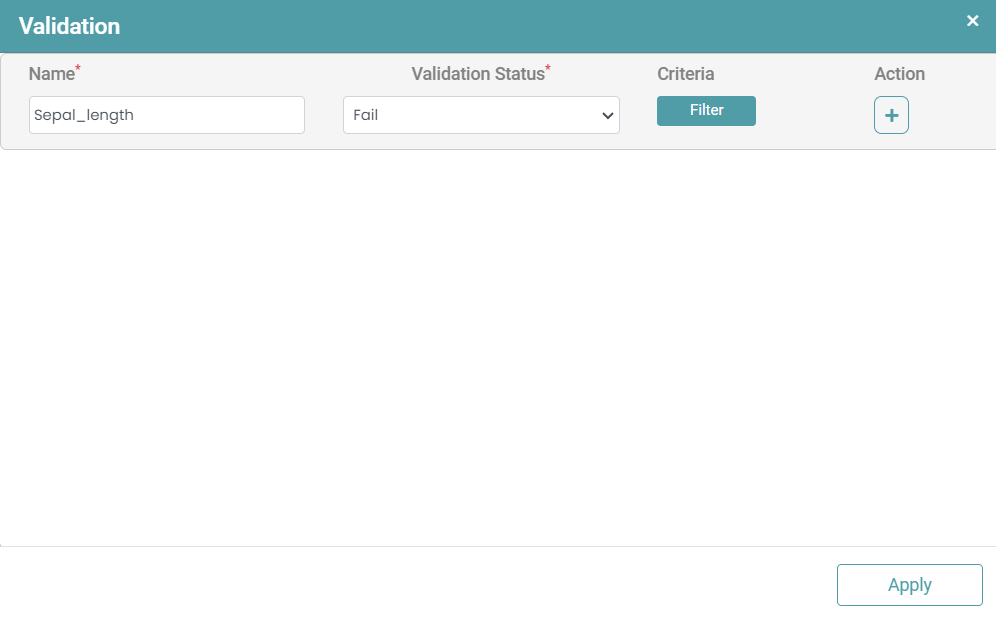
Step 3: Click on the select button on the right side of the screen. A validation popup appears wherein you can enter the name of the condition and click on filter. (Refer to the image below).
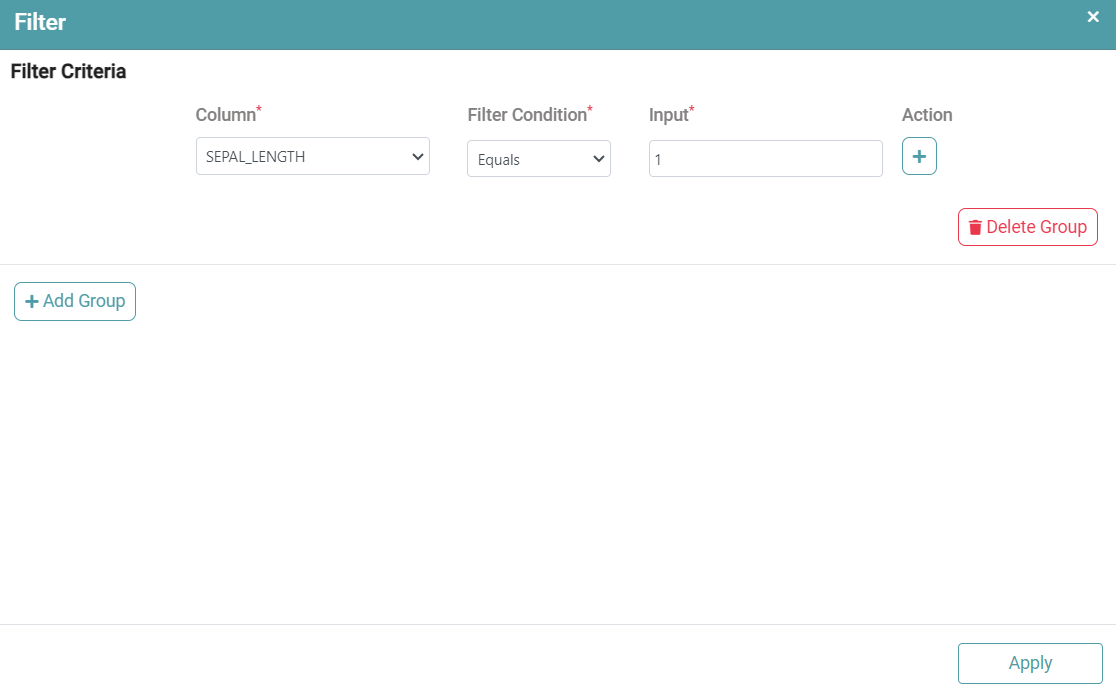
Step 4: Once you click on the filter button under criteria, a filter popup appears. You can select the column, choose the filter condition and enter the input value. Click on Apply (Refer to the image below).
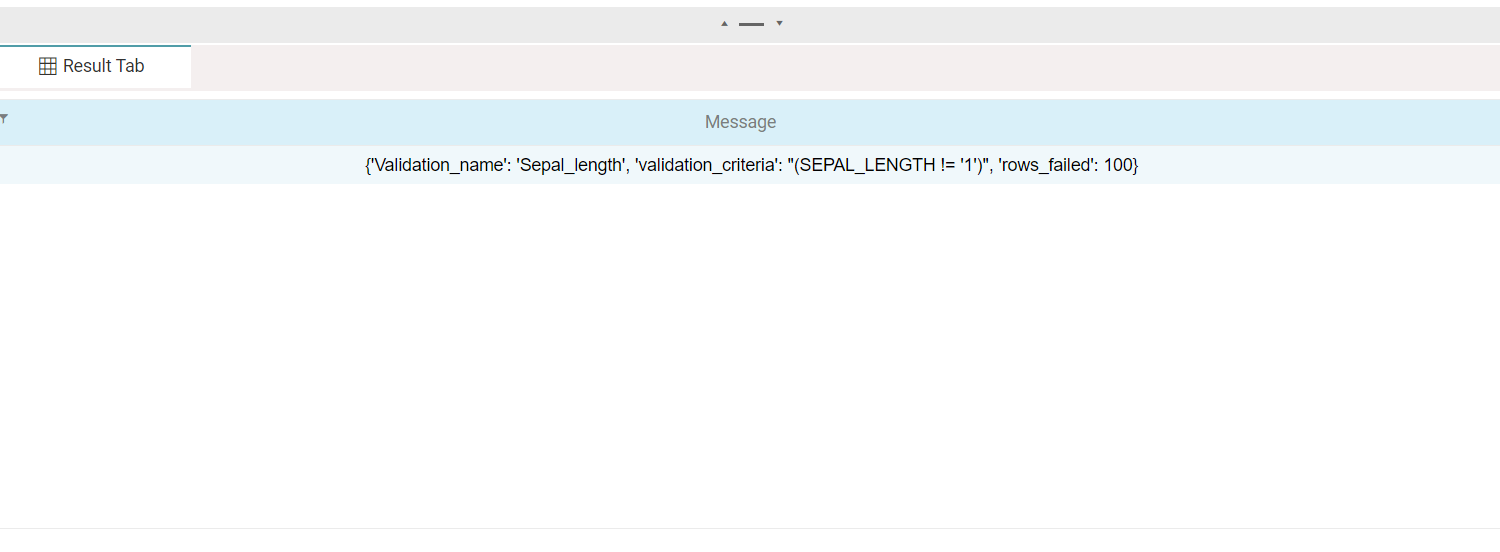
Step 5: You can then choose the validation status between skip or fail. In the images above the criteria for fail has been chosen.
Step 6: If the validation status has been selected as Fail and if the conditions are true, then the result is as given below. (Refer to the image below).
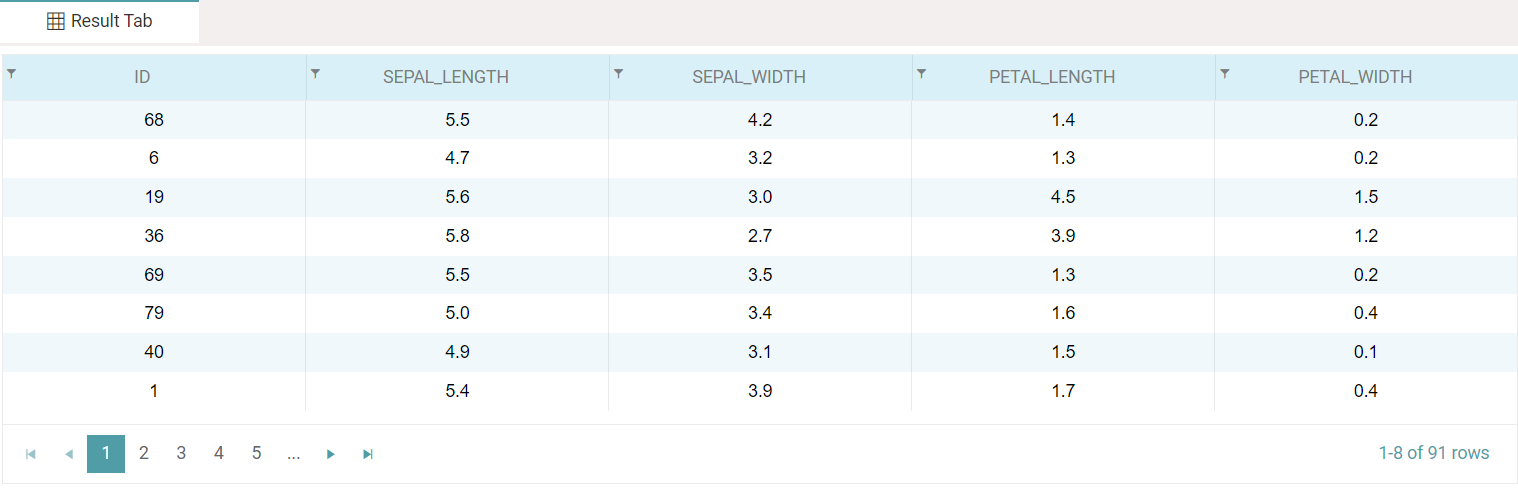
Step 7: If the validation status has been selected as Skip, and if the conditions are met, the result is as given below. (Refer to the image below).
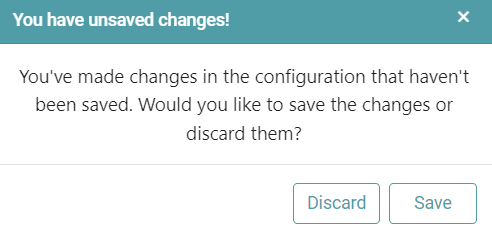
Note: After configuring a node, ensure you click “Save” to retain the changes. If you need to undo the configuration, click “Discard.” Failing to choose either “Save” or “Discard” will trigger a warning pop-up. (Refer to the image below).