Data Import Node – Introduction
Step 1: Click on the ‘Design Tab’ on the ‘Main Navigation Bar’.
Step 2: Click on the add icon on the bottom right of the screen.
Step 3: Click the add new icon.
Step 4: Click on the Workflow icon to create a new Workflow.
Step 5: Select the data import node. Drag and drop the node onto the main screen.
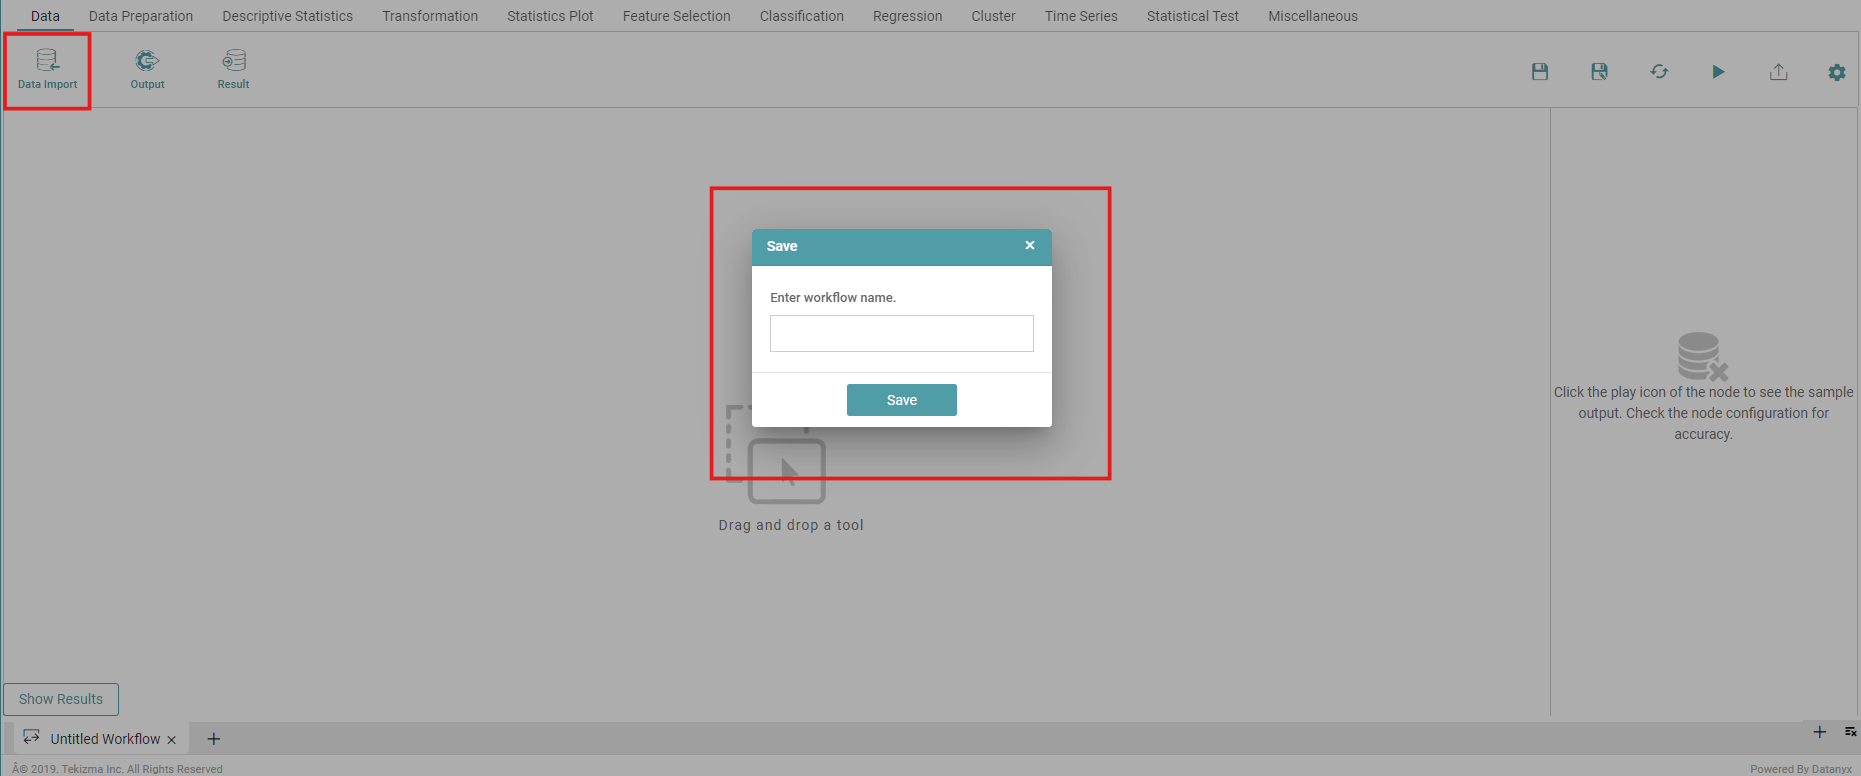
Step 6: A Pop up appears. Enter the desired name and save the workflow. (Refer to the image below).


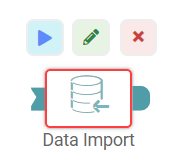
Step 7: Click on the data import icon. Three popups appear above the icon.
Step 8: You can click on the run icon to see the result once the configurations have been done. Click on the pencil mark icon to change the data import icon name.
Step 9: Click on the cross-mark icon to delete the data import icon. (Refer to the image below).
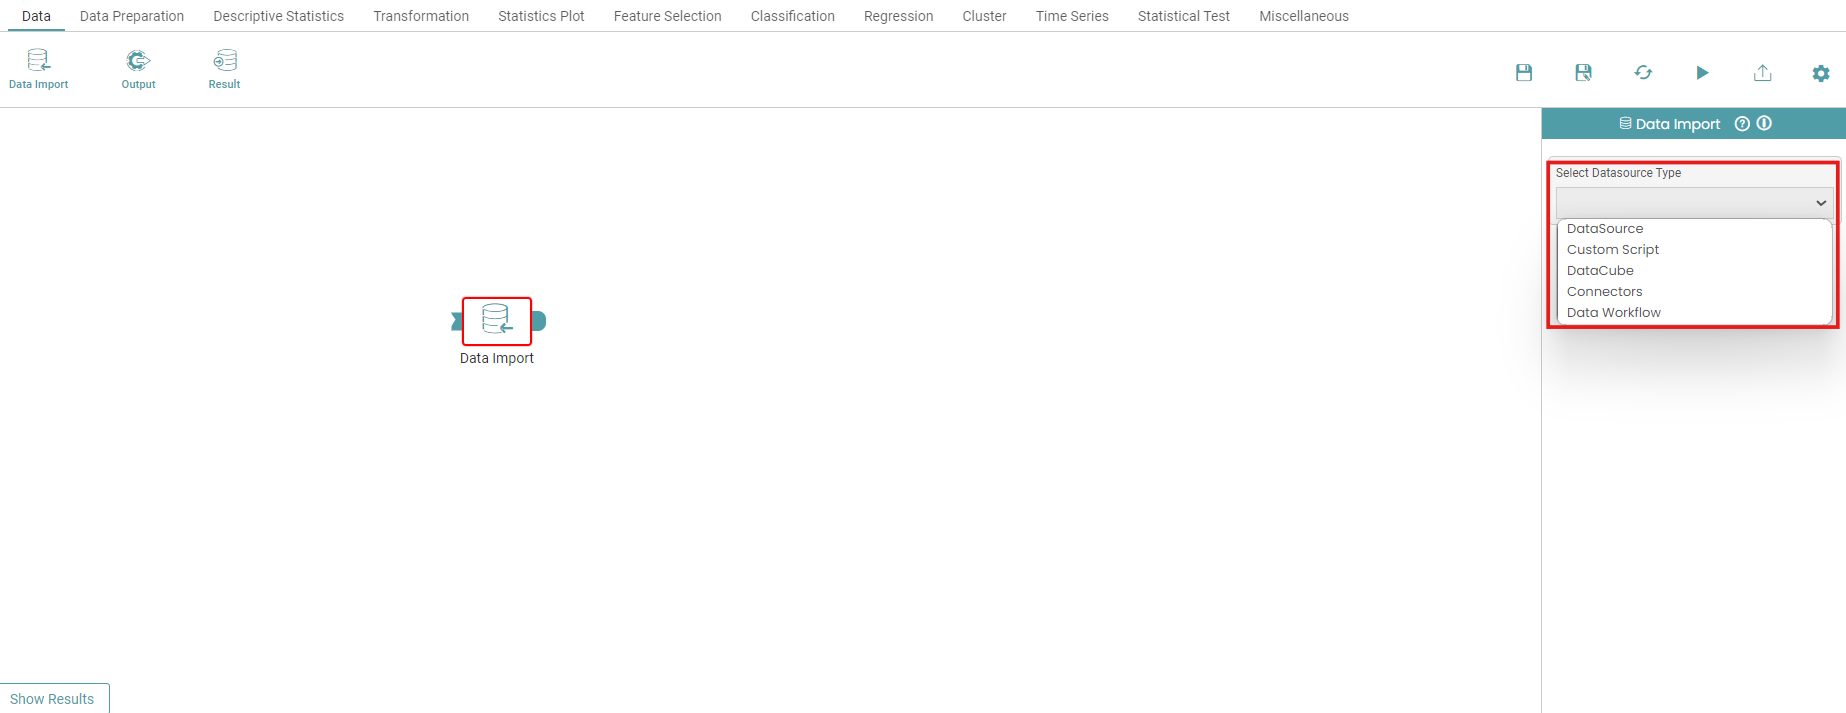
Step 10: Under ‘Data Import’, select the Data Source type dropdown and click on the required Datasource. (Refer to the image below).
Step 11: Click on the ‘Select Data Source’ dropdown and choose the required data set.
Step 12: Click on the run button to see the import of data.
Step 13: Click on the “Show Results” on the bottom line to view the result.
Step 14: Data imported from data source will appear in a table format.
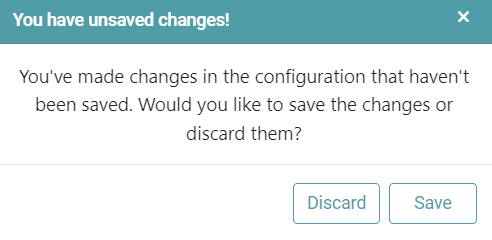
Note: After configuring a node, ensure you click “Save” to retain the changes. If you need to undo the configuration, click “Discard.” Failing to choose either “Save” or “Discard” will trigger a warning pop-up. (Refer to the image below).