Output Node – Introduction
Used to export the data from the created workflow to the respective destination (either a database or an excel/csv).
Override
This is used to truncate an existing dataset/ table from the database and write the current workflow table.
Step 1: Create a new workflow.
Step 2: Select the data import node. Drag and drop the node onto the main screen.
Step 3: Select the data source and the data set.
Step 4: Now, drag and drop the output node that is under ‘Data’ onto the main screen.
Step 5: Connect the ‘data import and output’ node. Click on the ‘Override’ radio button. (Refer to the image below).
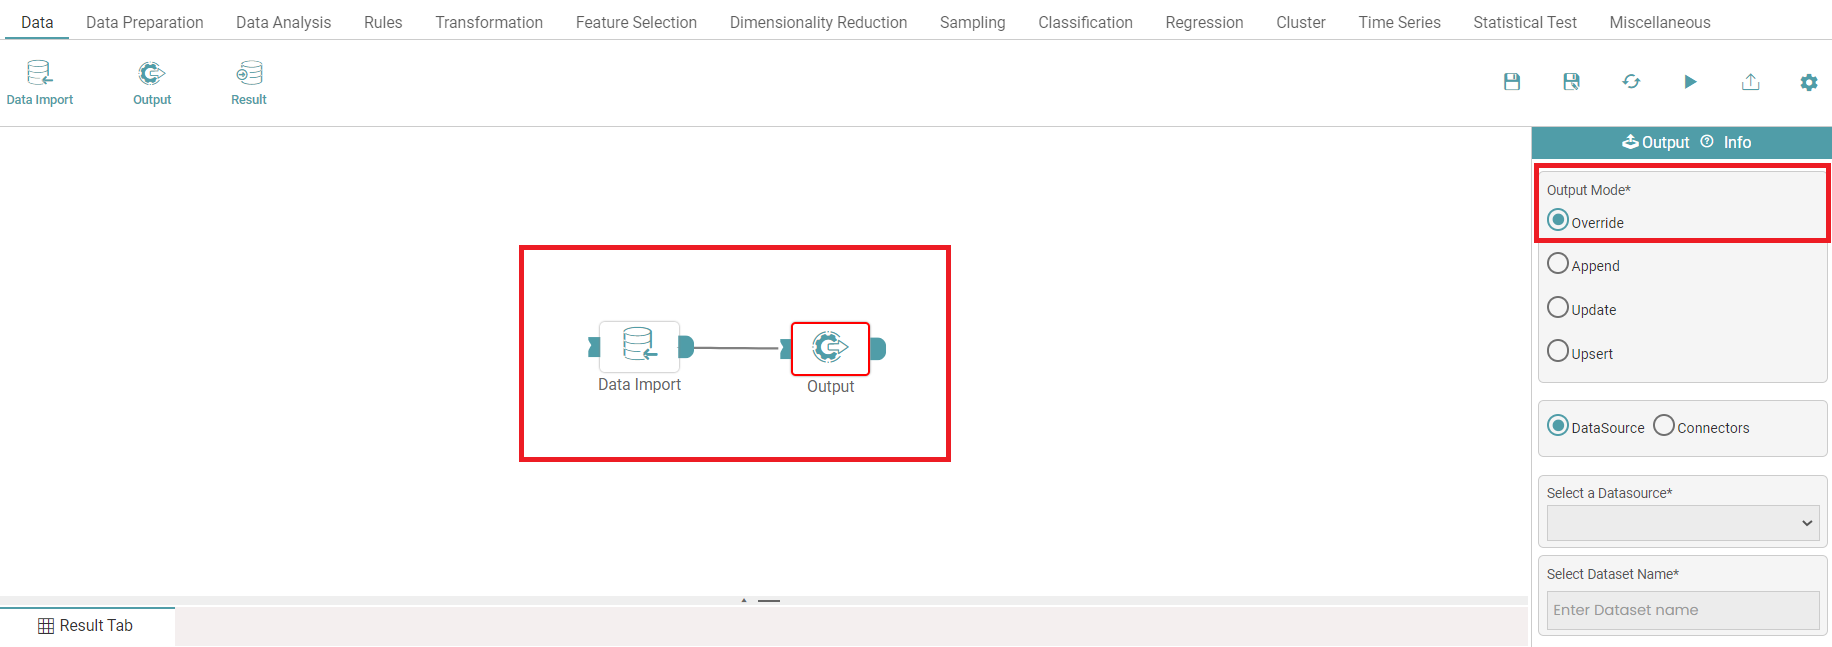


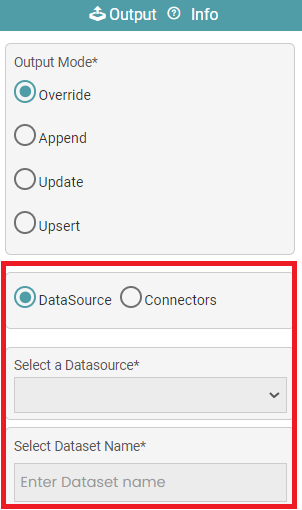
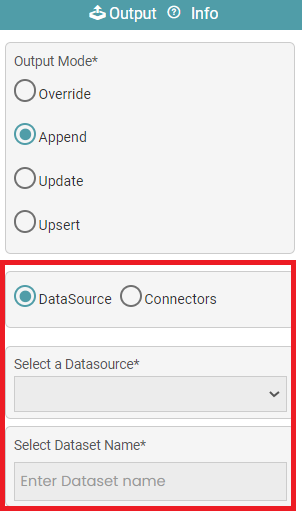
Step 6: Select the data source or connectors. Enter the dataset name (name of the destination file) in case data source is selected. (Refer to the image below).
Step 7: In the case of a connector, select the connector, choose the file type, enter the folder name, file name and max records per file and click on the apply button.
Note: The file name can include date expressions enclosed in square brackets []. The following date expressions can be provided for use in file name: YYYY (four-digit year), YY (two-digit year), DD (day), H (hour), M (minute), and S (second).
Step 8: Now, the table containing the configured data is stored in the destination database.
Note: You can enable the design in view check box such that they can get the output in the design mode.
Append
This feature helps you to write new rows and tables below the existing table rows in the database.
Step 1: Create a new workflow.
Step 2: Select the data import node. Drag and drop the node onto the main screen.
Step 3: Select the data source and the data set.
Step 4: Now, drag and drop the output node that is under ‘Data’ onto the main screen.
Step 5: Connect the ‘data import and output’ node. Click on the ‘Append’ radio button. (Refer to the image below).
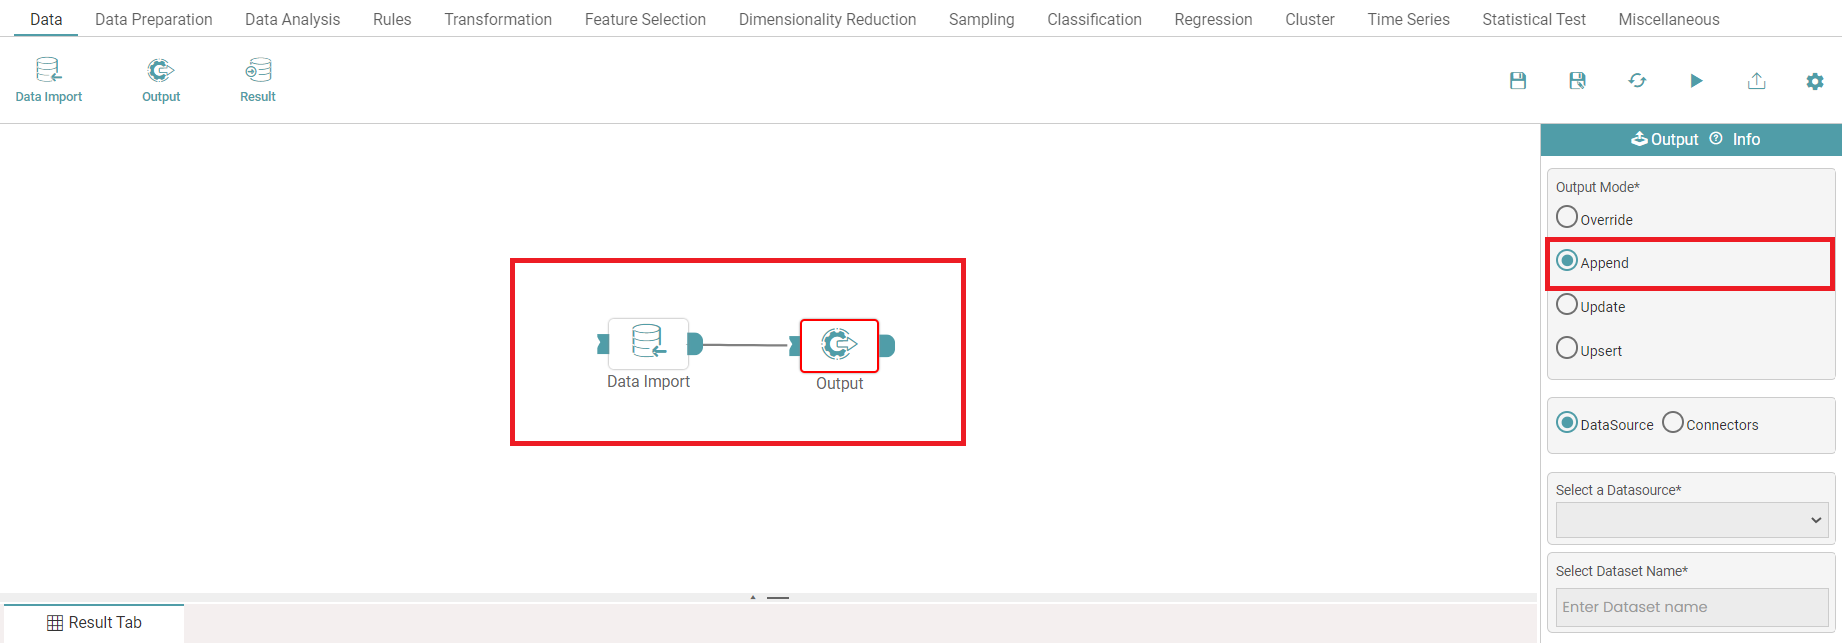
Step 6: Select the data source or connectors. Enter the dataset name (name of the destination file) in case data source is selected. (Refer to the image below).
Step 7: In the case of a connector, select the connector, choose the file type, enter the folder name, file name and max records per file and click on the apply button.
Note: The file name can include date expressions enclosed in square brackets []. The following date expressions can be provided for use in file name: YYYY (four-digit year), YY (two-digit year), DD (day), H (hour), M (minute), and S (second).
Step 8: Now, the table containing the configured data is stored in the destination database.
Note: You can enable the design in view check box such that they can get the output in the design mode.
Update
This is used to update a single or multiple columns of a table/ dataset. You need to give a primary key (can be multiple keys) which specifies the location of update.
Step 1: Create a new workflow.
Step 2: Select the data import node. Drag and drop the node onto the main screen.
Step 3: Select the data source and the data set.
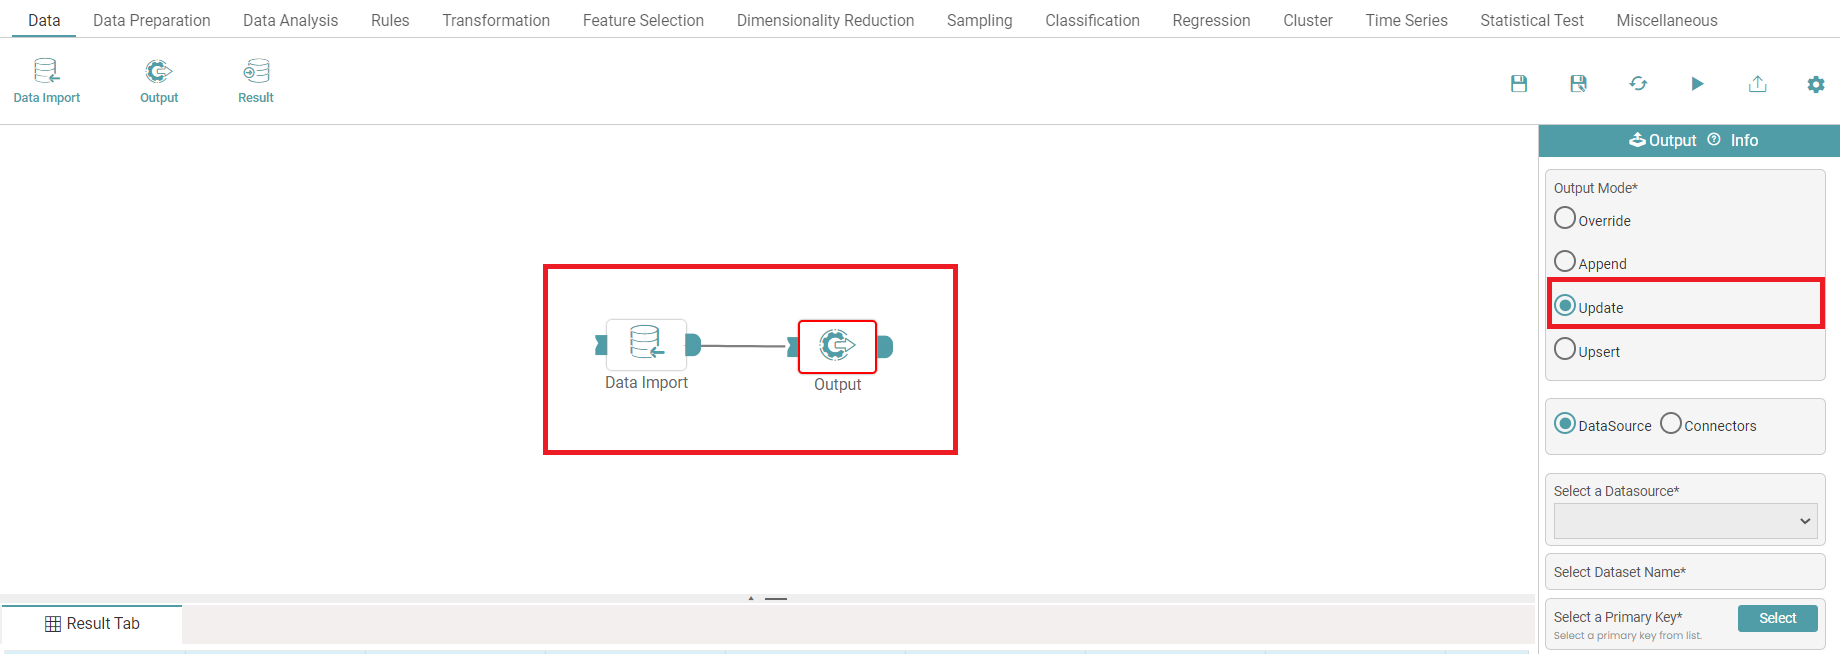
Step 4: Now, drag and drop the output node that is under ‘Data’ onto the main screen.
Step 5: Connect the ‘data import and output’ node. Click on the ‘Update’ radio button.
Step 6: Select the data source or connectors. Enter the dataset name (name of the destination file) in case data source is selected. (Refer to the image below).
Step 7: In the case of a connector, select the connector, choose the file type, enter the folder name, file name and max records per file and click on the apply button.
Note: The file name can include date expressions enclosed in square brackets []. The following date expressions can be provided for use in file name: YYYY (four-digit year), YY (two-digit year), DD (day), H (hour), M (minute), and S (second).
Step 8: Click on the select button to select the primary key. A pop-up appears. Choose the primary key. This should contain unique values. Click on ‘Apply’.
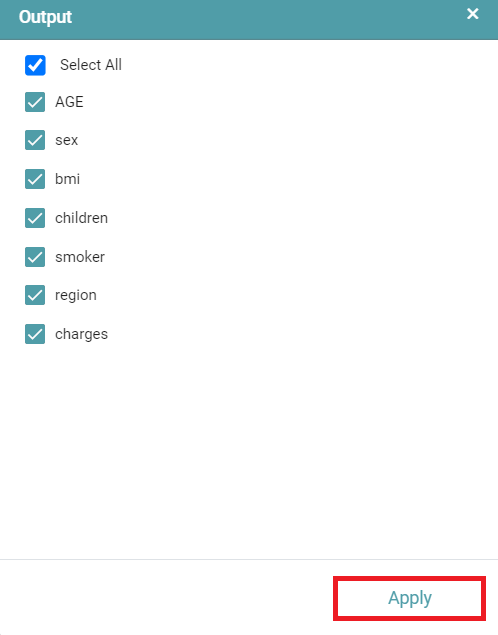
Step 9: Click on the update button, you can see that a pop-up appears. Select the column(s) that you want to update. Click on ‘Apply’. (Refer to the image below).
Step 10: Now, the table containing the configured data is stored in the destination database.
Note: You can enable the design in view check box such that they can get the output in the design mode.
Upsert
Updates the rows that are already present in the database and inserts the new rows.
Step 1: Create a new workflow.
Step 2: Select the data import node. Drag and drop the node onto the main screen.
Step 3: Select the data source and the data set.
Step 4: Now, drag and drop the output node that is under ‘Data’ onto the main screen.
Step 5: Connect the ‘data import and output’ node. Click on the ‘Upsert’ radio button.
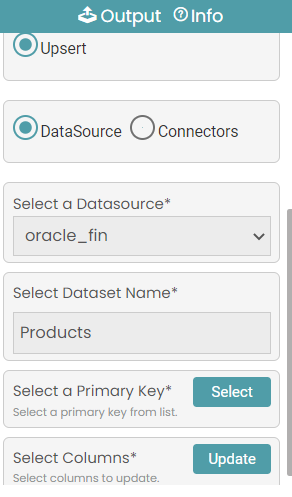
Step 6: Select the data source or connectors. Select the data source and enter the dataset name in case the data source radio button is selected.
Step 7: In the case of a data source, select the primary key and select the columns and click on update. (Refer to the image below).
Step 8: In the case of a connector, select the connector, choose the file type, enter the folder name, file name and max records per file and click on the apply button.
Note: The file name can include date expressions enclosed in square brackets []. The following date expressions can be provided for use in file name: YYYY (four-digit year), YY (two-digit year), DD (day), H (hour), M (minute), and S (second).
Step 9: Click on the run button and the result is displayed under the result tab in the form of a table. (Refer to the image below).
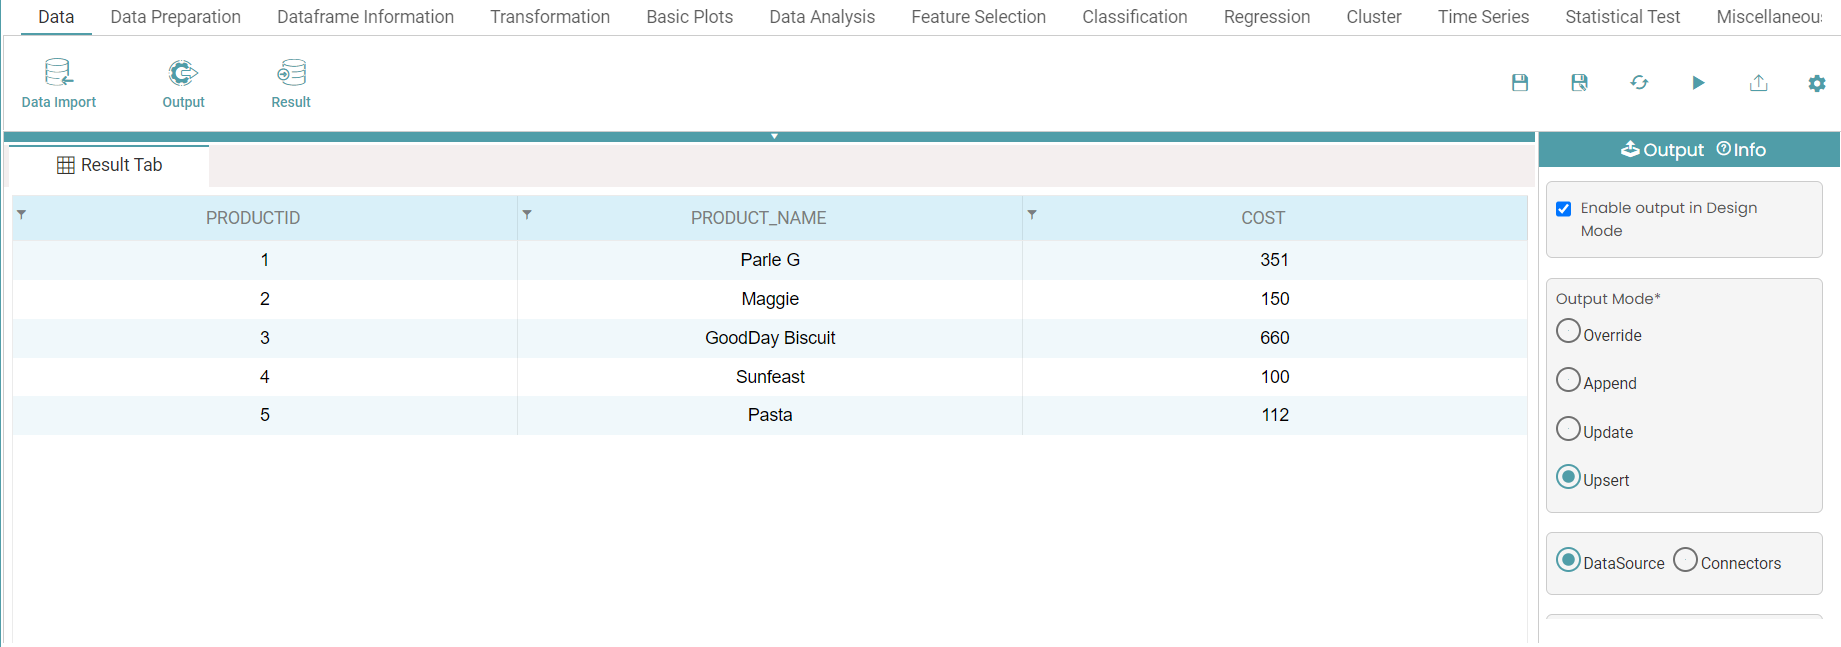
Note: You can enable the design in view check box such that they can get the output in the design mode.
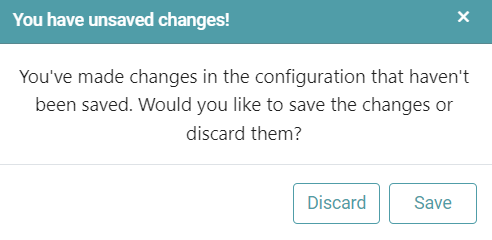
Note: After configuring a node, ensure you click “Save” to retain the changes. If you need to undo the configuration, click “Discard.” Failing to choose either “Save” or “Discard” will trigger a warning pop-up. (Refer to the image below).