Introduction
Bulk Data Transformation does transformation on multiple tables/ datasets at the same time.
The ‘Actions/ Transformations’ for the Bulk Data Transformation is like that of Data transformation. [Refer to this Link: Actions].
Bulk Data Transformation – Excel Template
Step 1: Configure the data source to which you want to apply your transformations. [Refer to this Link: Creation of Data Source. Create a new Workflow].
Step 2: Click on transformation. Drag and drop the bulk data transformation node onto the main screen. Select the data source by clicking on the ‘Select a Data Source’ dropdown. (Refer to the image below).


Step 3: Click on the configure button. A pop-up appears. Click on template. (Refer to the image below).
Step 4: An excel file will be downloaded. Open the file. Click on sheet 1 in Excel. Here, you can perform different actions to multiple datasets at a time. (Refer to the image below).

Step 5: Enter the dataset name, field name and the actions. Save the file. (Refer to the image below).

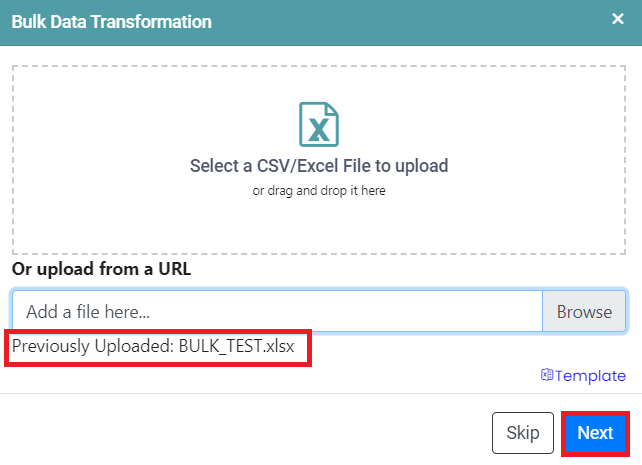
Step 6: Now, click on upload and choose the saved file. Click on the next button. (Refer to the image below).
Step 7: From the pop-up that opens, select the dataset (original table name).
Step 8: Click on the dataset name and ensure that the check box has been selected.
Step 9: The changes made in excel will have been updated. Click on ‘Apply’. (Refer to the image below).

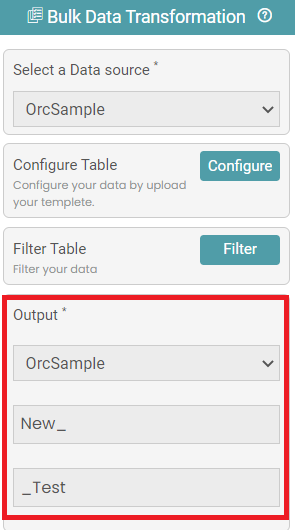
Step 10: Click on the output dropdown and select the data source. Enter the prefix and suffix for the data source. (Refer to the image below).
Step 11: Now, the table containing the configured data is stored in the destination database.
Bulk Data Transformation – Manual Configuration
Step 1: Click on transformation. Drag and drop the bulk data transformation node onto the main screen. Select the data source by clicking on the ‘Select a Data Source’ dropdown. (Refer to the image below).
Step 2: Click on the configure button. A pop-up appears. Click on skip to manually configure the datasets. (Refer to the image below).
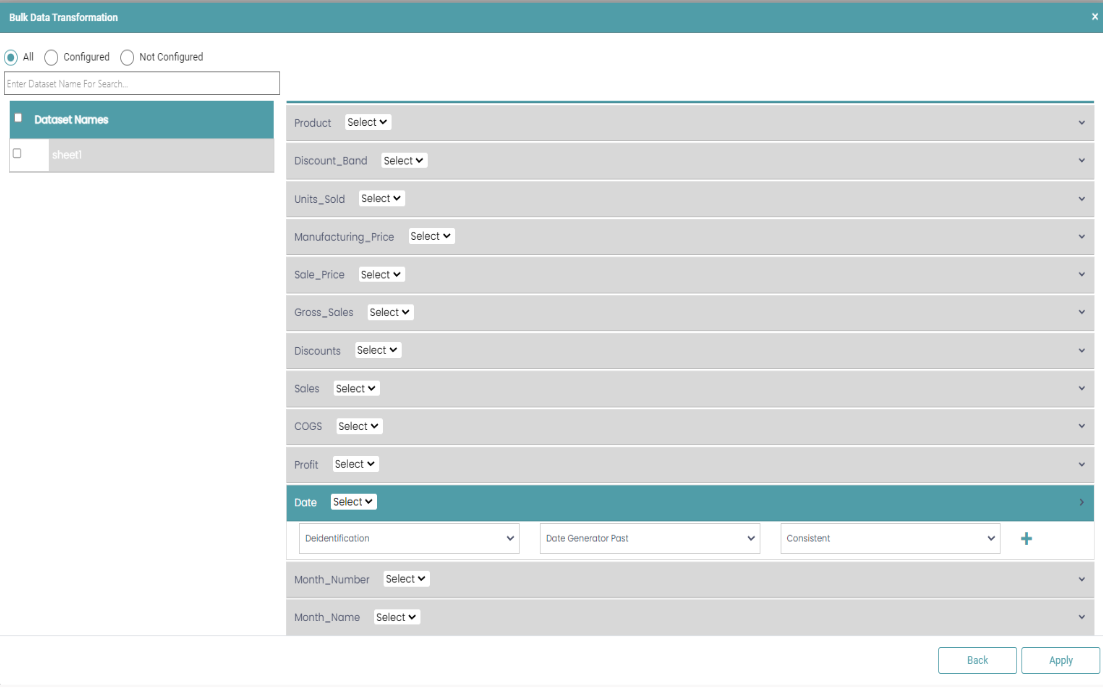
Step 3: Once the skip button has been clicked, you will see another pop-up screen.
Step 4: Here, you can select the dataset/ table required and make the necessary changes to the columns in the selected dataset/ table. You can make changes to multiple columns at a time by clicking on the actions available.
Step 5: Once the configuration required is selected, click on the ‘Apply’ button. (Refer to the image below).
Step 6: Click on the filter button to filter the data further or click on the output dropdown and select the data source.
Step 7: Enter the prefix and suffix for the data source. (Refer to the image below).
Step 8: Once the data source has been selected, click on the run button to run the workflow.
Step 9: Click on the “Show Results” on the bottom line to view the result.
Step 10: When the changes are successful, the user will get the table in the image below under the result tab. (Refer to the image below).
Step 11: Now, the table containing the configured data is stored in the destination database.
Bulk Data Transformation – XML
Step 1: Configure the data source to which you want to apply your transformations. [Refer to this Link: Creation of Data Source. Create a new Workflow].
Step 2: Click on transformation. Drag and drop the bulk data transformation node onto the main screen. Select the data source by clicking on the ‘Select a Data Source’ dropdown. (Refer to the image below).

Step 3: Click on the configure button. A pop-up appears. You can upload a file from the local device. Click on next to configure the datasets. (Refer to the image below).

Note:
Instead of uploading a file from the local device, the user can choose the template option to set things up. Also, the steps for transforming bulk data with XML are identical to those for the Excel Template. The user can follow them after completing Step 2.
Step 4: From the pop-up that opens, select the dataset/ table (original table name).
Step 5: Click on the dataset name and ensure that the check box has been selected.
Step 6: Under the Value dropdown, ensure that XML has been selected. The changes made in excel will have been updated. Click on ‘Apply’. (Refer to the image below).

Note:
Users can choose various types of data transformations and the corresponding actions. Additionally, they have the option to decide how the transformed data should appear, whether randomly or consistently. Lastly, they need to enter the field path to finalize the configuration.
Few Points to Consider:
- For deidentification purposes, you need to include the field path:
Example: recordTarget/patientRole/patient/name/family when handling the specified value.
- If deidentification pertains to an attribute, the corresponding field path would be: Example: recordTarget/patientRole/patient/ethnicGroupCode/[codeSystemName].
- To deidentify a specific name among multiple nodes with the same name, indicate the name followed by [the number of that node]. If you aim to deidentify a specific index, the field path below remains applicable.
The associated field path in this context would look something like this:
Example: component/structuredBody/component[4]/section/text/table/tbody/tr/td[3].
- In the scenario that the column you want to deidentify is a Datetime/ timestamp then follow the steps given below:
- Convert that field/ value to timestamp using Datatype Conversion.
- Then apply the required deidentification conversion. (Refer to the image below).

Step 7: Click on the output dropdown and select the data source. Enter the prefix and suffix for the data source. (Refer to the image below).

Step 8: Now, the table containing the configured data is stored in the destination database.
Bulk Data Transformation – JSON
Step 1: Configure the data source to which you want to apply your transformations. [Refer to this Link: Creation of Data Source. Create a new Workflow].
Step 2: Click on transformation. Drag and drop the bulk data transformation node onto the main screen. Select the data source by clicking on the ‘Select a Data Source’ dropdown. (Refer to the image below).

Step 3: Click on the configure button. A pop-up appears. You can upload a file from the local device. Click on next to configure the datasets. (Refer to the image below).

Note:
Instead of uploading a file from the local device, the user can choose the template option to set things up. Also, the steps for transforming bulk data with JSON are identical to those for the Excel Template. The user can follow them after completing Step 2.
Step 4: From the pop-up that opens, select the dataset (original table name).
Step 5: Click on the dataset name and ensure that the check box has been selected.
Step 6: Under the Value dropdown, ensure that JSON has been selected. The changes made in excel will have been updated. Click on ‘Apply’. (Refer to the image below).

Note:
Users can choose various types of data transformations and the corresponding actions. Additionally, they have the option to decide how the transformed data should appear, whether randomly or consistently. Lastly, they need to enter the field path to finalize the configuration.
Few Points to Consider:
- For deidentification purposes, you need to include the field path:
Example: entry[*].resource.address[*].postalCode
Here the [*] signifies if you want to take the whole entry array.
To pick a specific value from the array give the index of that value in the path.
Example: entry[1].resource.address[4].state
Step 7: Click on the output dropdown and select the data source. Enter the prefix and suffix for the data source. (Refer to the image below).

Step 8: Now, the table containing the configured data is stored in the destination database.
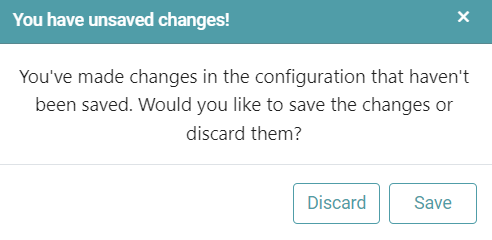
Note: After configuring a node, ensure you click “Save” to retain the changes. If you need to undo the configuration, click “Discard.” Failing to choose either “Save” or “Discard” will trigger a warning pop-up. (Refer to the image below).