SQL Executor Node – Introduction
Step 1: Click on the transformation tab.
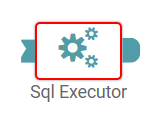
Step 2: Drag and drop the SQL node onto the main screen (Refer to the image below).
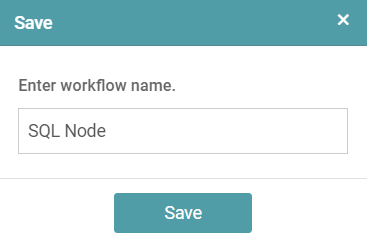
Step 3: Once you drop the node onto the main screen, a save popup appears. Enter the workflow name and click on the save button (Refer to the image below).
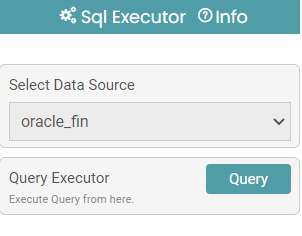
Step 4: Select the data source on the right side of your screen.
Step 5: Once the data source has been selected, click on the query button to execute the query. (Refer to the image below).
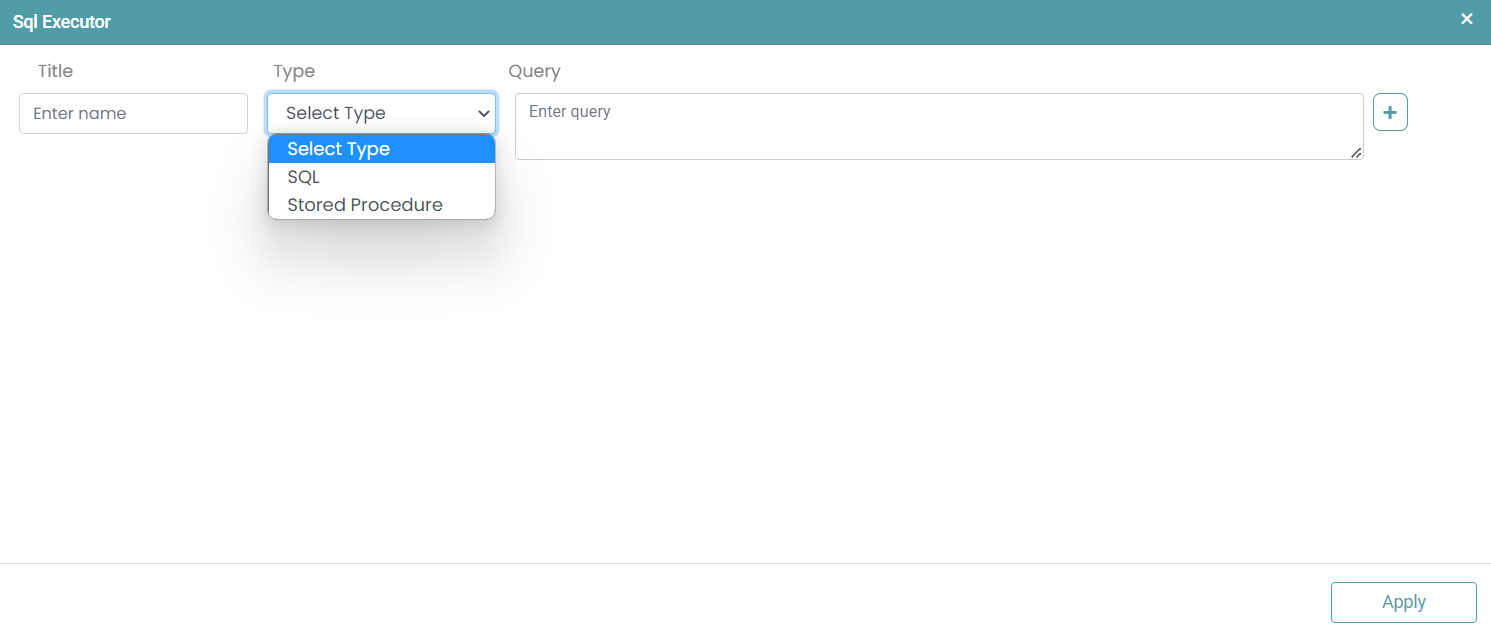
Step 6: Upon clicking “Query”, a SQL Executor popup appears.
Step 7: You can enter the Title, Type and Query. Multiple queries can be added by clicking on the add button on the right.
Step 8: Click on Apply once the necessary inputs have been entered. (Refer to the image below).


Step 9: Click on the run button to run the SQL Executor node. Click on the Show Results button and the result is shown under the result tab. (Refer to the image below).

Note:
The effect of the query executed above can be seen in the selected data source.
Note: After configuring a node, ensure you click “Save” to retain the changes. If you need to undo the configuration, click “Discard.” Failing to choose either “Save” or “Discard” will trigger a warning pop-up. (Refer to the image below).
