Migration Plan
Step 1: On the Main Navigation Bar, click the “Migration” icon.
Step 2: In the “Migration” section, the user is presented with two options:
- Migration Plan: Migration plans are accessible to all admin users that belong to the same environment. It can be downloaded as a Datanyx file if need be. A new plan can be created in addition to the comprehensive list of plans that have been previously created by the users within the organization.
- Migration: Users can import any migration plan from other accounts/ environments or local migration folder by clicking on the import icon at the bottom right of the screen. The user is also able to check the status of their import.
Step 3: To create a new migration plan, click on the add icon located in the bottom right of the screen.
Step 4: A pop-up appears wherein the user can create a migration plan. (Refer to the image below).
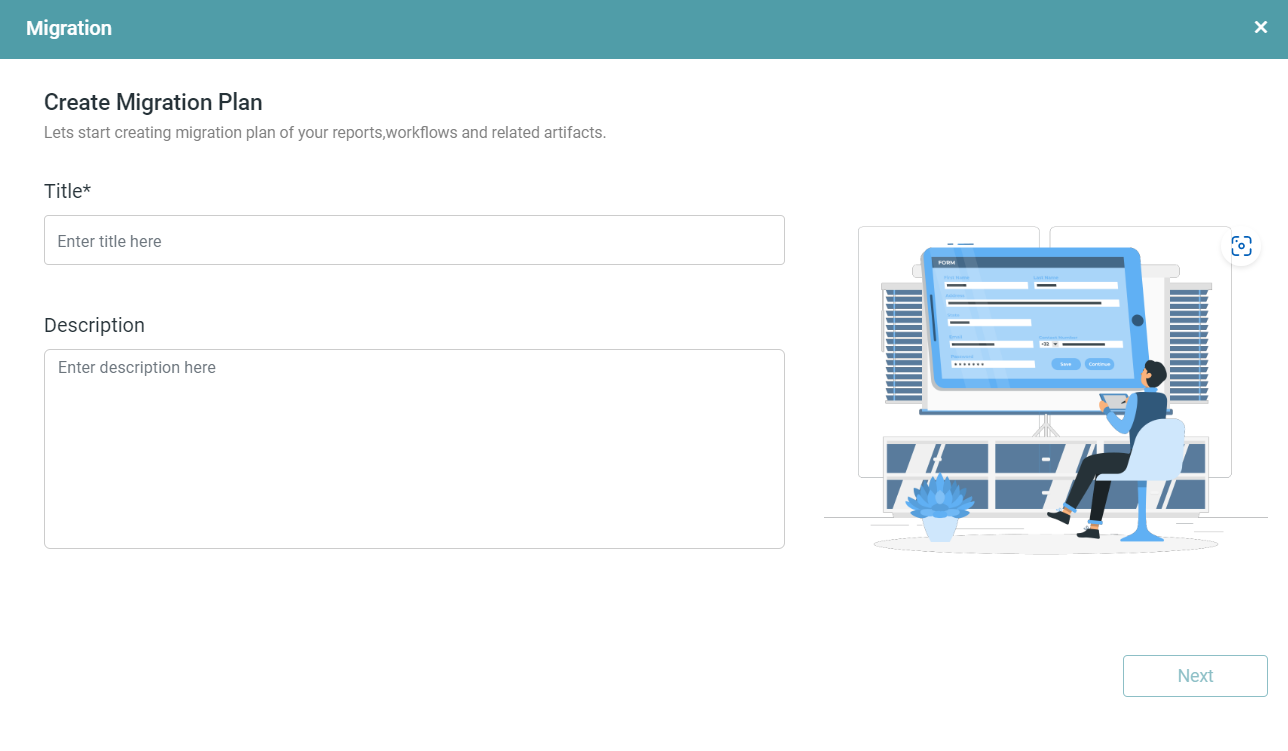


Step 5: Enter the title and description of the migration plan. Click on the next button.
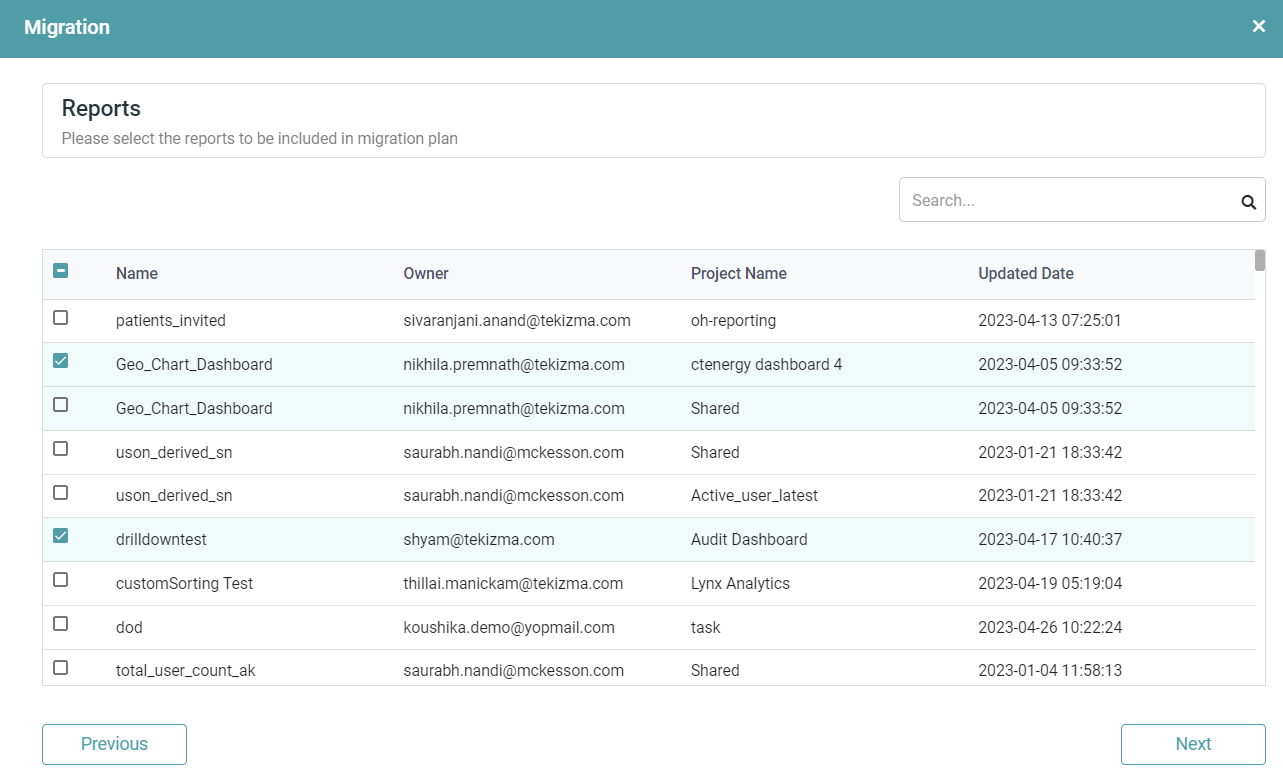
Step 6: Now, the user can select the Report(s) that needs to be migrated. Through the search bar, the user has the option to locate the desired report and select it using the checkbox.
Step 7: Click on the next button once the Report(s) have been selected. (Refer to the image below).
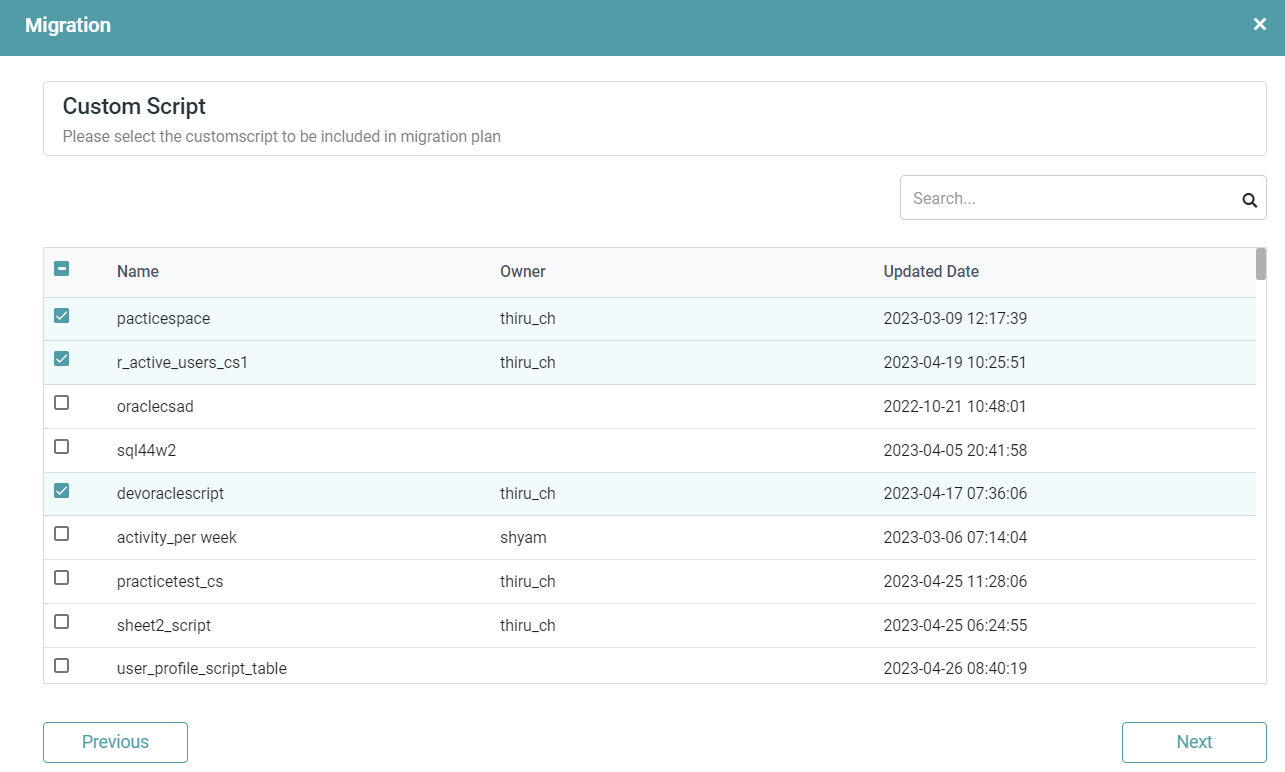
Step 8: The user can select the Custom Script(s) that needs to be migrated into their migration plan. Through the search bar, the user has the option to locate the desired custom script and select it using the checkbox.
Step 9: Click on the next button once the Custom Script(s) have been selected. (Refer to the image below).
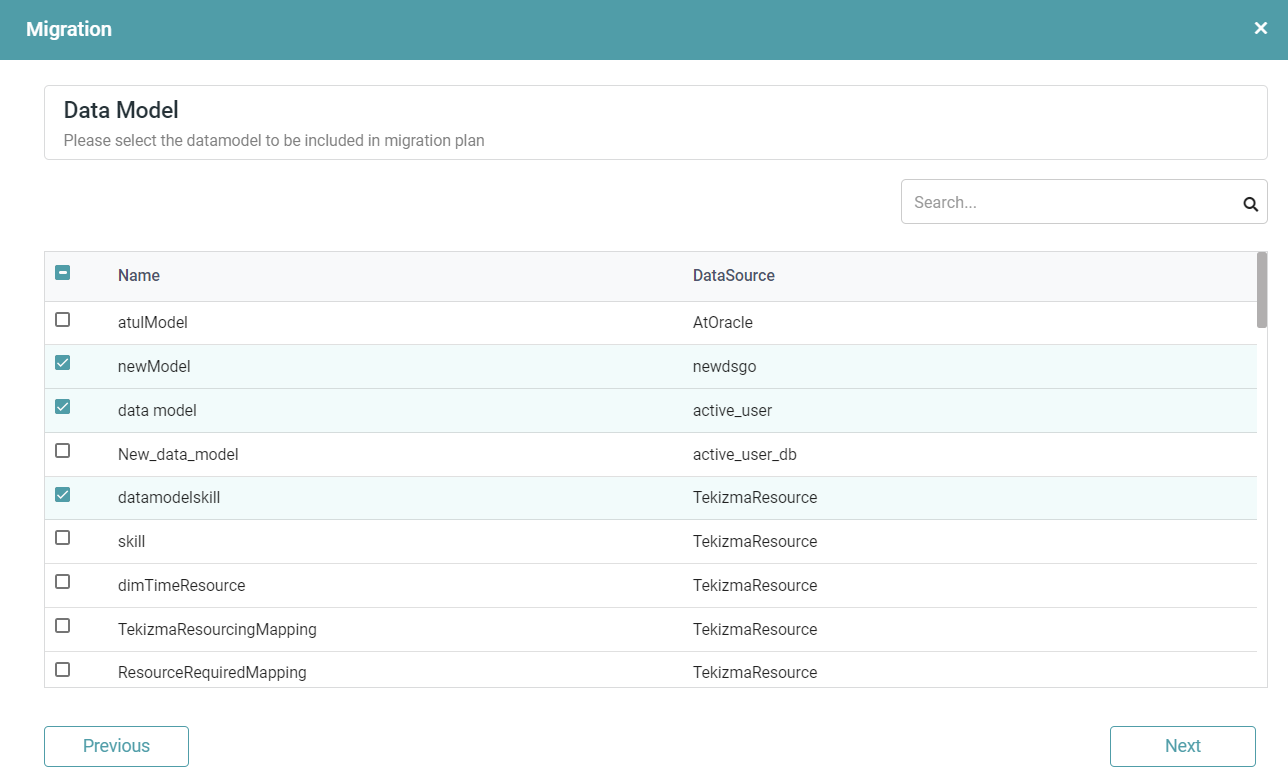
Step 10: The user can now select the Data Model(s) that need to be migrated. Using the search bar, the user has the option to locate the desired report and select it by clicking on the checkbox.
Step 11: Click on the next button once the Data Model(s) have been selected. (Refer to the image below).

Step 12: The user can select the Workflow(s) that needs to be migrated into their migration plan. Through the search bar, the user has the option to locate the desired workflow and select it using the checkbox.
Step 13: Click on the next button once the Workflow(s) have been selected. (Refer to the image below).
Step 14: The user can now see the Preview wherein the details of the selected Report(s), Custom Script(s), Data Model(s) and Workflow(s) have been listed. (Refer to the image below).
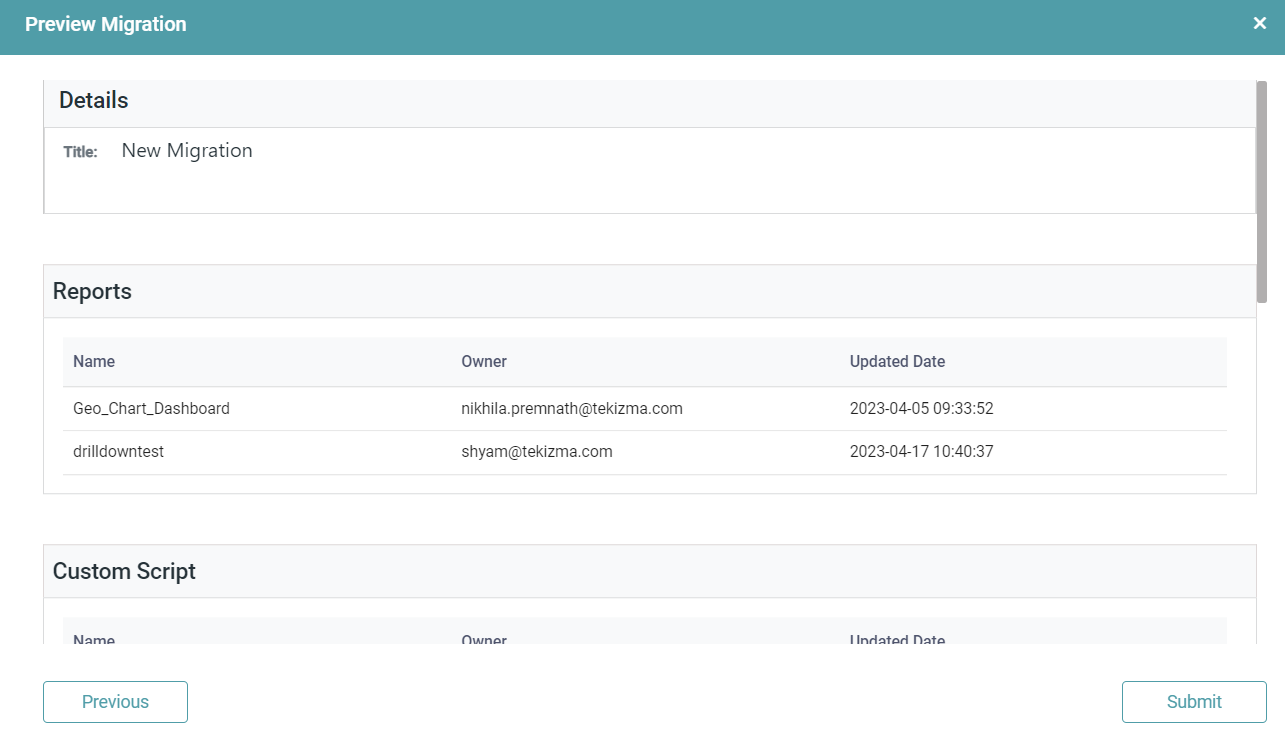
Step 15: Click on the Submit button once the desired artifacts have been chosen. The user can click on the previous button to go to the previous screen.
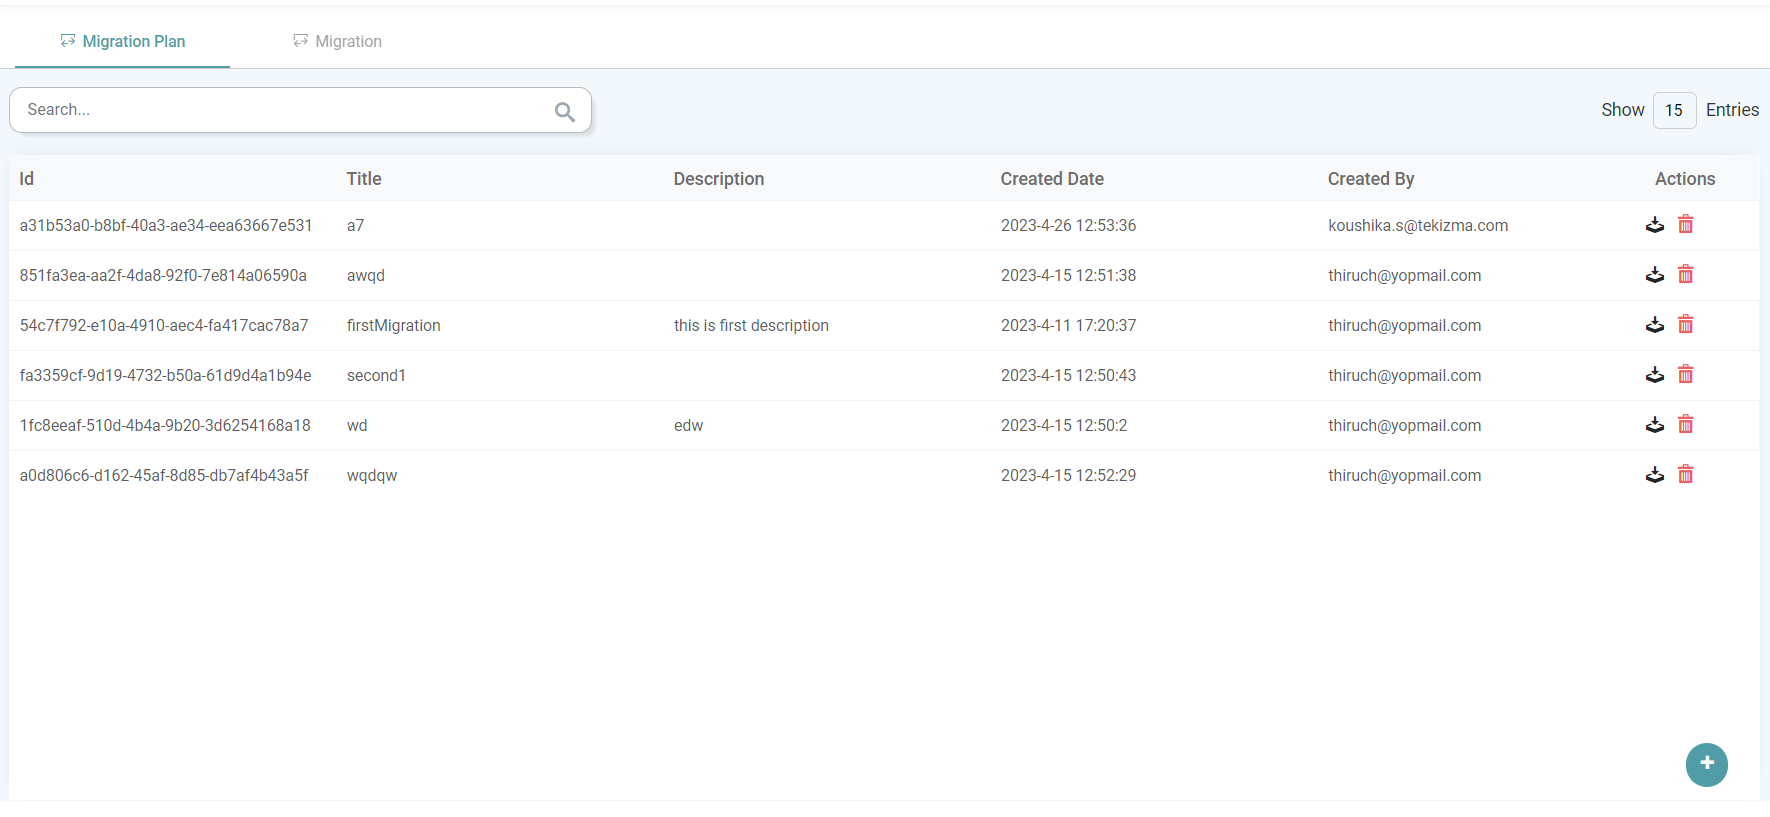
Step 16: The Migration Plan is available in the list wherein the user can download it. (Refer to the image below).
Note: It is not mandatory to select an artifact under each migration window.
Migration
Step 1: On the Main Navigation Bar Click the Migration icon.
Step 2: In Migration, we have two options:
Migration Plan: Migration plans are accessible to all admin users that belong to the same environment. It can be downloaded as a Zip file if need be. A new plan can be created in addition to the comprehensive list of plans that have been previously created by the users within the organization.
Migration: Users can import any migration plan from other accounts/ environment or local migration folder by clicking on the import icon at the bottom right of screen. The user is also able to check the status of their import.
Step 3: Click on the import migration icon. The Migration pop-up appears. (Refer to the image below).

Step 4: The user can select the following:
Project: The desired project under which the import of the migration plan is to take place.
Configuration Template: The user can select from the already existing configuration templates or can add a new template. The user can also edit the existing template.
A configuration template pop-up appears wherein the user can enter the title of the template, select the migration source environment, file type, enter the Source Id (Source id from the environment from where the file is to be imported from) and Local Id (Source id of the target environment to which the migration is to be performed).
If the type is Datasource Id, then the source Id (Datasource Id) will be the environment from where the migration has been done, and the Local Id (Destination Id) will be the environment to which the migration is to be performed. (Refer to the image below).

If the type is Connector Id, then the source Id will be the environment from where the migration has been done, and the Local Id (Destination Id) will be the environment to which the migration is to be performed. (Refer to the image below).
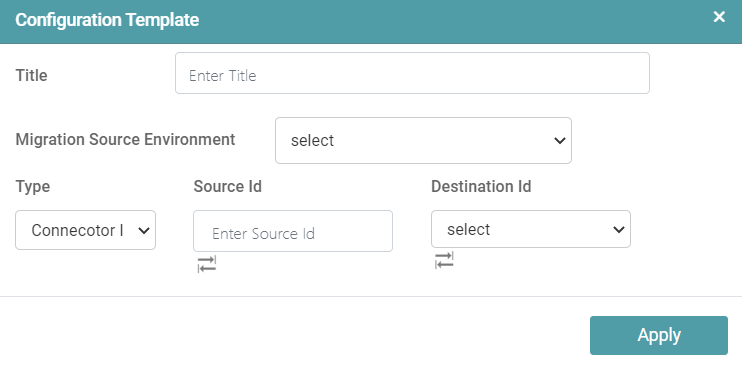
The user can configure multiple artifacts. The user can toggle between the Input box where they can enter manually. They can also select from the dropdown by clicking on the toggle button. (Refer to the image below).

Once the desired configurations have been done, click on the apply button.
Migration Plan: The user can choose the environment and the required migration plan. Alternatively, the user can click on the choose file button to import the previously downloaded migration plan.
The user can enter the desired notes for the plan (optional).
Step 5: Click on the Start Migration button to begin the process of migration. The migrated artifact will be available in the list of migrations upon successful migration. (Refer to the image below).

Note: The users under the same organization and same environment can view the logs of migrations plans executed by other users as well.